*Want the pattern for the socks pictured here? Click here to purchase*

This is fine for the un-ambitious.
Personally, I prefer to knit anything I can in one
piece. I think that’s knitting’s biggest
sculptural advantage—one can knit a fully shaped, one piece garment without any
cutting or sewing. Add to that the fact
that store-bought argyle socks are seamless, and perhaps you can see why, when
I learned that argyles “need” to be seamed, I took that as a challenge.
I’ve played with a few different ways to knit argyle in the
round over the years. I came up with
each on my own, although I’m sure that lots of other knitters have come to the
same solutions on their own over the years.
I’ve settled on what I think is the most successful method. That’s what I’m sharing here.
These instructions are written with the assumption that you
are familiar with and have knit a basic sock.
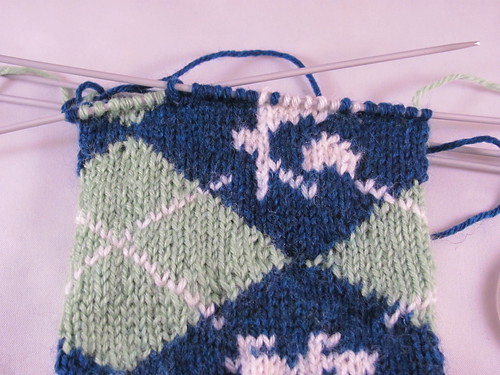
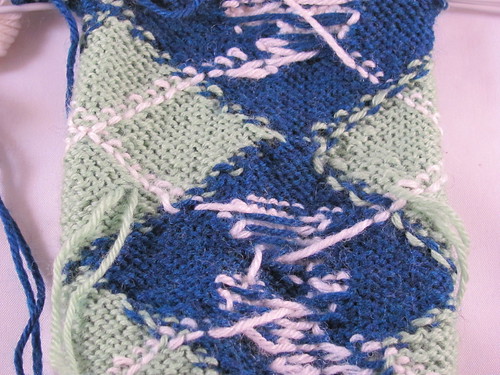
First, take a look at an argyle sock. There are usually diamonds in 2 different
colors, with a third color making the x’s that run through the diamonds. This pair has blue diamonds which will be on
the sides of the sock and green diamonds, while will be the front and back of
the sock. The diamonds interlock, so
that the blue diamond makes up the negative space around the green, and vice
versa.
To figure out where you are at each step of these
instructions, on each row you work, you’ll need to keep in mind which color of
diamonds is growing, and which is shrinking.
We’ll start where the green diamonds are growing, and the blue are
shrinking. By the way, I HIGHLY
recommend winding your diamond colors onto bobbins, whether you knit your
argyles in the round, or traditionally flat.
Either way bobbins greatly lessen the amount of tangling, and therefore
frustration, with any kind of intarsia knitting.
But that’s jumping ahead just a bit. To start the sock, cast on the number of
stitches you like to cast on for a sock.
A multiple of 4 is ideal. The
example sock is knit on 60sts at a gauge of 8sts per inch. Work 2x2 ribbing for about an inch in your
main (background) color.
Set up row: you’re beginning in the middle of the green
diamonds, which is at the point of the blue diamonds. Add in 2 different green bobbins, and 2 white
bobbins for the x’s. Also add a second
ball, or bobbin of blue. Divide your
total number of stitches by 4 to get x.
Knit 1 blue stitch, then continue knitting in green until you’ve counted
to x. Start counting again, but this
time the first stitch is a white cross stitch, then the rest of the green
bobbin until you’ve counted to x again. For
the second half of the sock, you’ll do the same thing, but this time you’ll
start back at the beginning of the row and purl across the inside. Using the second balls of each color, p x-1 green,
p1 white, p x-1 green, p1 blue, and you will have met your other half of the
cast on, half way around the sock. On
our 60st example sock this means: k1
blue, k14 green, k1 white, k14 green.
Start 2ndball of blue, p1 blue, start 2nd bobbin
of green, p14 green, start second bobbin of white, p1 white, p14 green. End of row.
Arrange your stitches across 4 needles, one for each diamond. So at the moment, each blue stitch is on its
own needle. You’ll use a fifth needle as
the working needle.
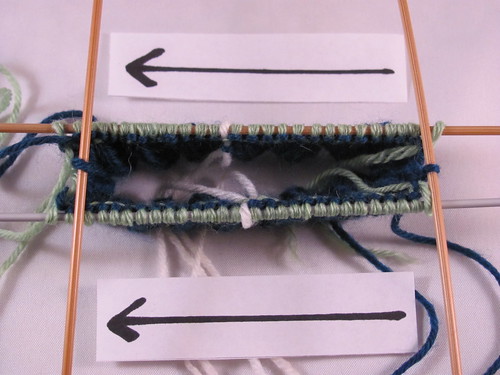
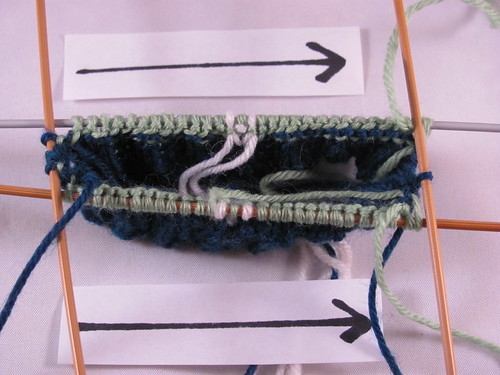
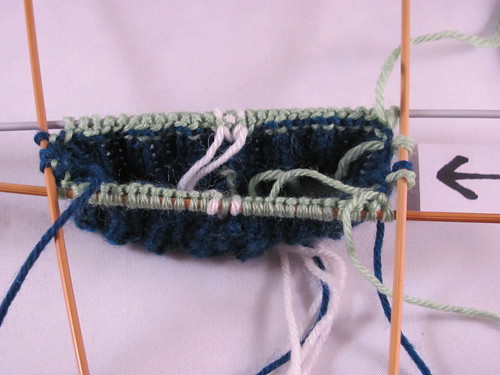
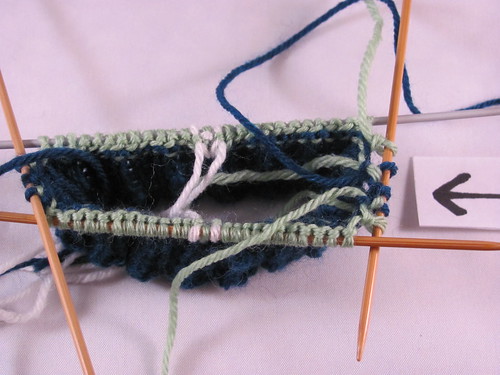
The arrows show the direction each green diamond was
worked. One was knit, the other purled.
At this point, both green strands of yarn are at the same
end of the sock. At that end, shift the
last green stitch on each needle onto the needle with the one blue stitch.
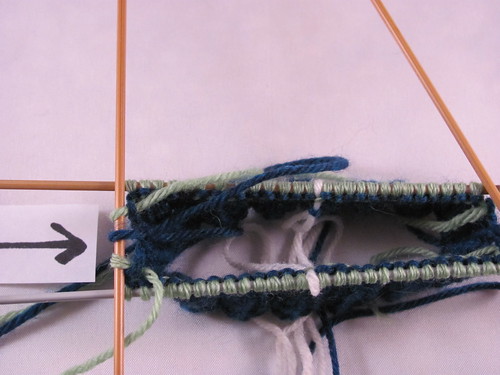
Knit those 3 sts in blue, being sure to wrap the blue yarn
with the green before and after you knit 3.
i.e. wrap, knit 3, wrap.
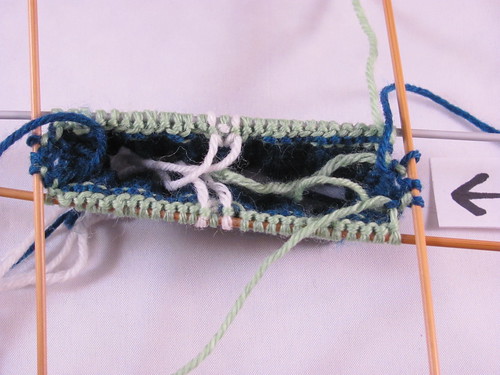
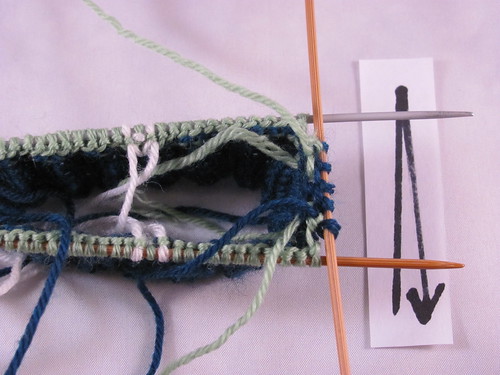
*VERY IMPORTANT* You
will always have the yarn ends of the “shrinking” diamonds right next to
whichever “growing” diamond you are working on.
This is so that you can wrap the ends around each other in proper
intarsia fashion at each edge of the growing diamond to prevent holes. If this is not a familiar process, please
look up intarsia knitting in you knitting books or online. You need to wrap your ends whether you work
your argyle socks in the round or flat.
This is what those wraps will eventually look like on the inside of your
sock.
Now work across each green diamond to the other side of the
sock. You’ll knit across one diamond,
and purl across the other, so as to keep the outside of the sock in stocking
stitch. In both cases, stop one stitch
shy of the end of the needle. You’ll
also add the last 2 bobbins of white (4 total) on this row. Remember that the white stitches each move by
one stitch on every row. If this makes
you crazy and is just one too many things to keep track of, feel free to leave
them out and add them with duplicate stitch after your sock is finished.
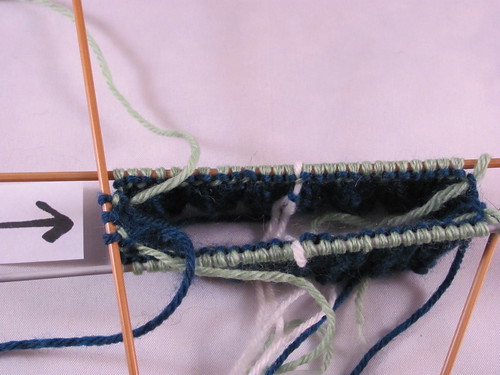
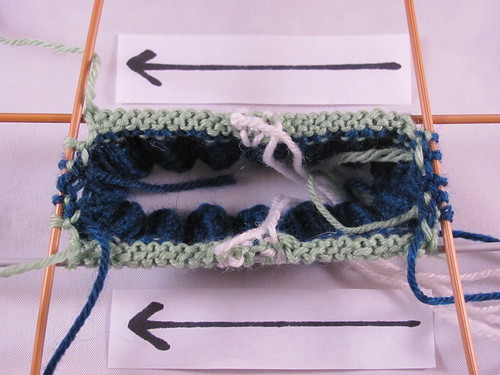
Slip each of those un-worked green stitches onto the needle
with the blue stitch.
Purl these three stitches in blue. Remember
to wrap your ends.
Slip one more green from each green needle onto the blue
needle you are working on.
Turn and knit these 5 sts.
Remember to wrap your ends.
You have worked 2 rows on the growing blue diamond, as
indicated by the arrow.
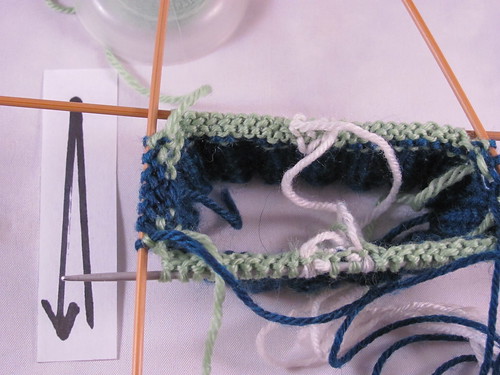
Now you’ve established your pattern. Here’s the whole thing in sequence.
1.
Work both shrinking green diamonds back to the
other side of the sock. Purl one, Knit
the other, keeping the outside of the sock in stocking stitch. Do not work the last stitch on each green diamond needle,
instead, slip them to the needle holding the growing blue diamond.
2. Purl the stitches
on the blue needle, slip another green from each needle, turn, and work across
again. Remember to wrap your ends.
I’m going to stop writing that now, but you should keep doing it at
every boundary between colors. You’ve
now gone back and forth on the blue needle.
That’s it. You’re now
ready to work back across the shrinking green diamonds, and do the same thing
on the other side.
In general, you always work across both shrinking diamonds
to bring them to one side of the sock, leave the end stitches, then work back
and forth on the growing diamond, knitting the left behind stitches on the
first pass, and the slipping two new stitches to the growing diamond’s needle
to work on the second pass.
Keep doing this until the growing diamonds have grown across
the whole sock. There will be one row
with only blue and white stitches, no green.
At this point everything shifts.
The green diamonds start growing from one stitch, and the blue diamonds
become the shrinking diamonds. Start
over again with the instructions just after the set up row, but this time with the colors reversed. Once the blue diamonds shrink down to just
one stitch, you’re back to the beginning.
Continue like this until you’re ready to do the heal, at which point
your sock can easily become a simple sock, knit out of just your back ground
color all the way to the toe. You could
also do a contrast heal and toe. It’s
your sock—do what pleases you.
If, once you’ve tried this, the whole thing makes you want
to throw your project across the room, don’t torture yourself. Go back to knitting your argyles in the tried
and true flat method.
*Want the pattern for the socks pictured here? Click here to purchase*

2 comments:
Running, boating, cycling, hiking and other similar activities demand a huge power and energy from your feet and what if your feet are not properly protected? With the very same aspect in our mind, socks at wholesale prices
Can I see the finished sock? How do you manage increases?
Post a Comment