Showing posts with label knitting. Show all posts

Friday, September 13, 2013

How to Knit Argyle Socks in the Round


*Want the pattern for the socks pictured here?  Click here to purchase* 

Traditionally, the leg of an argyle sock is knit flat.  Once the leg has been knit it is seamed up the back, and the rest of the sock is knit in the round. 

This is fine for the un-ambitious.

Personally, I prefer to knit anything I can in one piece.  I think that’s knitting’s biggest sculptural advantage—one can knit a fully shaped, one piece garment without any cutting or sewing.  Add to that the fact that store-bought argyle socks are seamless, and perhaps you can see why, when I learned that argyles “need” to be seamed, I took that as a challenge.

I’ve played with a few different ways to knit argyle in the round over the years.  I came up with each on my own, although I’m sure that lots of other knitters have come to the same solutions on their own over the years.  I’ve settled on what I think is the most successful method.  That’s what I’m sharing here.
These instructions are written with the assumption that you are familiar with and have knit a basic sock.
First, take a look at an argyle sock.  There are usually diamonds in 2 different colors, with a third color making the x’s that run through the diamonds.  This pair has blue diamonds which will be on the sides of the sock and green diamonds, while will be the front and back of the sock.  The diamonds interlock, so that the blue diamond makes up the negative space around the green, and vice versa.

To figure out where you are at each step of these instructions, on each row you work, you’ll need to keep in mind which color of diamonds is growing, and which is shrinking.  We’ll start where the green diamonds are growing, and the blue are shrinking.  By the way, I HIGHLY recommend winding your diamond colors onto bobbins, whether you knit your argyles in the round, or traditionally flat.  Either way bobbins greatly lessen the amount of tangling, and therefore frustration, with any kind of intarsia knitting.

 Argyle 1

But that’s jumping ahead just a bit.  To start the sock, cast on the number of stitches you like to cast on for a sock.  A multiple of 4 is ideal.  The example sock is knit on 60sts at a gauge of 8sts per inch.  Work 2x2 ribbing for about an inch in your main (background) color.

Set up row:  you’re beginning in the middle of the green diamonds, which is at the point of the blue diamonds.  Add in 2 different green bobbins, and 2 white bobbins for the x’s.  Also add a second ball, or bobbin of blue.  Divide your total number of stitches by 4 to get x.  Knit 1 blue stitch, then continue knitting in green until you’ve counted to x.  Start counting again, but this time the first stitch is a white cross stitch, then the rest of the green bobbin until you’ve counted to x again.  For the second half of the sock, you’ll do the same thing, but this time you’ll start back at the beginning of the row and purl across the inside.  Using the second balls of each color, p x-1 green, p1 white, p x-1 green, p1 blue, and you will have met your other half of the cast on, half way around the sock.   On our 60st example sock this means:  k1 blue, k14 green, k1 white, k14 green.  Start 2ndball of blue, p1 blue, start 2nd bobbin of green, p14 green, start second bobbin of white, p1 white, p14 green.  End of row.  Arrange your stitches across 4 needles, one for each diamond.  So at the moment, each blue stitch is on its own needle.  You’ll use a fifth needle as the working needle.

 Argyle 2

The arrows show the direction each green diamond was worked.  One was knit, the other purled.
At this point, both green strands of yarn are at the same end of the sock.  At that end, shift the last green stitch on each needle onto the needle with the one blue stitch.

 Argyle 3

Knit those 3 sts in blue, being sure to wrap the blue yarn with the green before and after you knit 3.  i.e. wrap, knit 3, wrap. 

 Argyle 4

*VERY IMPORTANT* You will always have the yarn ends of the “shrinking” diamonds right next to whichever “growing” diamond you are working on.  This is so that you can wrap the ends around each other in proper intarsia fashion at each edge of the growing diamond to prevent holes.  If this is not a familiar process, please look up intarsia knitting in you knitting books or online.  You need to wrap your ends whether you work your argyle socks in the round or flat.  This is what those wraps will eventually look like on the inside of your sock.

 Argyle 12

Now work across each green diamond to the other side of the sock.  You’ll knit across one diamond, and purl across the other, so as to keep the outside of the sock in stocking stitch.  In both cases, stop one stitch shy of the end of the needle.  You’ll also add the last 2 bobbins of white (4 total) on this row.  Remember that the white stitches each move by one stitch on every row.  If this makes you crazy and is just one too many things to keep track of, feel free to leave them out and add them with duplicate stitch after your sock is finished.

 Argyle 5

Slip each of those un-worked green stitches onto the needle with the blue stitch.

 Argyle 6

Purl these three stitches in blue.  Remember to wrap your ends.

 Argyle 7

Slip one more green from each green needle onto the blue needle you are working on.

Argyle 8

Turn and knit these 5 sts.  Remember to wrap your ends. 
You have worked 2 rows on the growing blue diamond, as indicated by the arrow.

 Argyle 9

Now you’ve established your pattern.  Here’s the whole thing in sequence.

1.       Work both shrinking green diamonds back to the other side of the sock.  Purl one, Knit the other, keeping the outside of the sock in stocking stitch.  Do not work the last stitch on each green diamond needle, instead, slip them to the needle holding the growing blue diamond.

Argyle 10

2.   Purl the stitches on the blue needle, slip another green from each needle, turn, and work across again.  Remember to wrap your ends.  I’m going to stop writing that now, but you should keep doing it at every boundary between colors.  You’ve now gone back and forth on the blue needle.

 Argyle 11

That’s it.  You’re now ready to work back across the shrinking green diamonds, and do the same thing on the other side. 

In general, you always work across both shrinking diamonds to bring them to one side of the sock, leave the end stitches, then work back and forth on the growing diamond, knitting the left behind stitches on the first pass, and the slipping two new stitches to the growing diamond’s needle to work on the second pass.
Keep doing this until the growing diamonds have grown across the whole sock.  There will be one row with only blue and white stitches, no green.  At this point everything shifts.  The green diamonds start growing from one stitch, and the blue diamonds become the shrinking diamonds.  Start over again with the instructions just after the set up row, but this time with the colors reversed.  Once the blue diamonds shrink down to just one stitch, you’re back to the beginning.  Continue like this until you’re ready to do the heal, at which point your sock can easily become a simple sock, knit out of just your back ground color all the way to the toe.  You could also do a contrast heal and toe.  It’s your sock—do what pleases you.

If, once you’ve tried this, the whole thing makes you want to throw your project across the room, don’t torture yourself.  Go back to knitting your argyles in the tried and true flat method.

*Want the pattern for the socks pictured here?  Click here to purchase* 

Tuesday, August 06, 2013

The Year of the Snake


dyed "snake" sock blank

2013 is the year of the snake.  I celebrated back in January with my fiber pals at Raveloe.  We dyed long thin sock blanks to look like snakes.  Everyone had their choice of what to do next.  I unravelled mine and knit socks as intended.

Year of the Snake socks

I am happy with the results, and even though it was January, I figured I was sort of done with the year of the snake and wouldn't think about the Chinese Zodiak again until January 2014 or the next time I ate in a Chinese restaurant with the Zodiak placemats.

Silly me. 

My property has a pleasing amount of wildlife living on it, or at least passing through.  It feels good to see lots of plants and animals around the yard; I feel like I've made good choices and have created a healthy eco-system.  We tend to see one or two garter snakes around the place each summer.  There is a creak running along the edge of our property and because of that there seem to be a lot of frogs, and frogs are a favorite food for garter snakes.

For whatever reason this year we have many more garter snakes than we have had in the past.  In the spring I would see at least 2 every time I worked in the yard or flower beds.  I started trying to count them based on size and markings, and I think I tracked at least 6 different snakes.  They make me really nervous when I mow the lawn, because as I mow I see them quickly slithering away from the mower.  If they head for a flower bed I figure that they're safe, but sometimes they make bad choices, like slithering into the unmown grass, or onto the concrete sidewalk where I know they won't stay until I'm done, or back towards the mower, so I had gotten into the habit of picking up the ones who made bad choices and carrying them to the flower bed.  When I did this two weeks ago, I found out that while garter snakes are only mildly venomous, I am one of the lucky few people who have a reaction to their bites.  Not terrible, but my hands puffed up for a day, and that snake was set into the flower bed less gently and from a greater distance than the others.

Then last week my worst fears came true, and I inadvertantly hurt an animal.  I'm still upset about it and don't know how exactly it happened, but now there is a snake in our yard that we have nick-named "stumpy."

Finally yesterday morning I was doing some landscaping before going to work.  We had some topsoil left over from the spring and had stored it in the yard on a tarp.  We folded the tarp up over it a few times to try to keep it dry.  When I unfolded the tarp it was FULL OF SNAKES.  Like 2 in each layer.  One was a baby, which was super exciting to see, but I'm a little nervous now that I know about the allergy, so I left the tarp open and walked away, hoping that they would leave.  I had  to keep checking under the tarp before shoveling the dirt so I wouldn't accidently hurt any hiding snakes with my shovel.

So yeah, it's definitely the Year of the Snake at my house.  What's next year?  I hope it isn't the Tiger yet.

Sunday, May 20, 2012

On Mistakes

The wise are not wise because they make no mistakes.  They are wise because they correct their mistakes as soon as they recognize them.
--from Xenocide, by Orson Scott Card
As a kid, school work came fairly easily to me.  I could usually get a B on my first effort, which left me free to go outside and play.  In high school I worked harder on the first effort and got A's, which left me free for drama club, odyssey of the mind, scholastic bowl, and other geeky fun.  It wasn't until college, where there weren't grades, that I was expected to go back into a project and turn in a second draft, or sketch, or sewing sample.  I was also expected to take risks and experiment.  If done correctly, true risks and honest experiment lead to failure, or at least unexpected results, half the time or more.  That means going back and trying again with new variables.  At the time, I hated making mistakes.  I saw them as failure.  If I had done better or known better, I would have gotten it right the first time.

After college in my professional life I still hated mistakes.  They felt like failure and I beat myself up over them.  This is a tough attitude to live with in technical theater.  In theater we experiment.  We also adjust the work on our little part once we see how it fits into the whole.  We get to a finished product in steps, and we definitely correct our errors.  So every time I got to dress rehearsal and got "notes" on my work, listing all the little problems that needed to be fixed for the next night, or changes that would make the costumes look better under the lights, or help the performers wearing them, it felt like failure.  If I was better at this I wouldn't get notes.

Luckily, I have come to understand mistakes better.  They're not failures.  They are part of a process, and only 1 step along the way.  The best thing about mistakes is that they can be corrected. It has taken a long time, but I now take joy in identifying the mistakes so that I can correct them.  I had to let go of the idea that a first attempt is the only attempt.  It is the first step, and it's purpose is to give me everything I need to get to the second step.  At work, I make things differently now, with the idea that each step is not being done to finish, but to put me at the best advantage for the second step.  And in aiming for a good process rather than an immediate perfect result, and being ready for mistakes, I make fewer.  Go figure.


I've been trying to teach my students this, while keeping in mind that I wasn't able to learn it yet when I was them.  I definitely see myself in my honor students, for whom high school was easy.  Unfortunately, school isn't life, and it turns out that being able to recognize and correct one's own mistakes has much more bearing on successful adult life than being really good at multiple choice test.  That's been a real let down, let me tell you.


I knit this cardigan years ago, but thanks to weight gain and an accidental trip through the washing machine, it has gotten rather tight.  It's a favorite, my first sweater where I started the process with dirty wool, and then washed, dyed, combed, spun, and knit.  So I'm not going to give it up, even if the buttons do gap.


But boy does that look crappy--and it makes me look fat.  My friend Becky had mentioned a knitting blog that went step by step through sewing grosgrain ribbon behind your button placket to keep it from gapping.  You see this all the time in store bought cardigans, especially the vintage 50's ones.  It finally clicked that I could go back and do this to a sweater even though it was already finished.  And boy was it worth going back in and fixing that, even years later.


close-up of grosgrain re-enforced buttonband


This is the inside of each button band--buttons on the right and holes on the left.  I used a wide (about 7/8") grosgrain behind the buttons, then removed them and re-stitched them going all the way through the sweater and the grosgrain.  I used 2 narrow bands (1/4-3/8") on the buttonhole side running down either side of the vertical buttonholes.  Both were whipped in by hand and none of the stitching shows in front.


Cardigan With Grosgrain Supported Buttonband


Much better!  Whether you call it fixing a mistake, or taking the next step in a project, the improvement is well worth the time it took!  At some point I'm going to go back into a number of my cardigans and do the same.


If you're not making mistakes, you're not trying hard enough!


--Miss Havisham in "The Well of Lost Plots" by Jasper Fford

Tuesday, February 07, 2012

I Tricked Out My MINI With Knitting

Hey, so have I mentioned that I got a new MINI Cooper?

I haven't posted in a while because we've been on our honeymoon. Not Chris and I, the MINI, Chris, and I. It's a bit of a debate about who gets to drive whenever we go somewhere.

MINI has always been a British car, and the new MINI Cooper definitely embraces that. Not just as a nationality, but also as a decorating scheme. You can order your MINI liberally sprinkled with Union Jacks from the entire roof top, to the rear view mirrors (all 3) to the valve stem caps, and everything in between.

Chris bought me the interior rear view mirror Union Jack for my birthday, before I even had the car. It was making the side mirrors look kind of naked and left out. I could have bought matching covers for them, but why buy what you can make yourself? I briefly considered paint, or glued on strips of ribbon, but then I realized that to really be MY MINI, they would have to be knitted.

In case you're not sure yet, I'm completely crazy. This is a completely crazy project, and you're going to be totally jealous of the results.

Let the jealousy begin:

Rear view mirrow cozies

note the stunning view of a garage on the Buff State Campus. What can I say, it's hard to find a picturesque parking spot most mornings.


rear view mirror cozy

As for crazy...the outer circumference is about 22" and a little over a hundred stitches. It's about 50 rounds of knitting, so really, a fairly small, seemingly quick project, except that I pulled out all the knitting stops for this one. In order to really get a good finished project, with a properly rendered flag that curves into 2 or three different parabolas, depending on what angle you view it from I used:

a fancy cast on for the center of a circle (don't know the proper name)
intarsia
intarsia in the round
switching between round and flat knitting
non-euclidean geometry or the semblance thereof
short rows

rear view mirror cozy

and dorset buttons.

For any non knitters to whom that list means nothing, this is what the work in progress looked like:

the crazy mess of intarsia


Yes, it's just as frustrating as it looks.

But they're small, and I'm small and determined, and it was oh so worth it to trick out my car with knitting.

And if you're thinking, "Aren't you worried someone will take them off in a parking lot," just don't say it to me. I've already heard it and no, I'm not too worried because a) they're on there really tight to make sure there's no chance of them slipping and blocking my view, b) few people will recognize the buttons for what they are and c) the side mirrors on a MINI are rather unique, so they would be useless to a non-MINI owner.

My next project for the car will be a Union Jack blanket.

Thursday, November 24, 2011

Finished

knitter on the roof

We finished the roof, and before the snow flies!

And no, there wasn't anything else I was supposed to be doing at this point. I was waiting for Billy and Chris to finish the chimney flashing so we could shingle around it.

Next year we build the dormer on the other side.

Monday, February 21, 2011

Birth/Rebirth

The snow receded some at the end of last week. On Sunday afternoon I found signs of new life.

snow drop

an emerging day lilly tip

This snow drop has barely lifted its head out of the snow:

putting the snow in snow drop

Last year my first snow drops emerged in mid-March, so despite the intense cold these are 3 or 4 weeks earlier. Maybe that silly groundhog was on to something.

Also, finished but for the buttons is the "baby sweater on two needles" known to most knitters as the February baby.

February baby and bonnet

I highly recommend this sweater. It was great fun to knit. It's quite easy, and every part of it fits together in that perfect way that Elizabeth Zimmerman sweaters do, thanks to her various percentage systems. I did change it to be completely seamless by knitting the body first, slipping stitches to holders for the sleeves and then casting on again across the held stitches so I could continue the body in one piece. I then picked up the sleeve stitches and knit them in the round on circular needles. I also changed the bottom edge just slightly. I always found the original garter stitch border clunky. I prefer lace patterns that provide their own edge with just a little adjustment, so when I got to the bottom edge I did not decrease as Elizabeth calls for, and I stayed in pattern, but changed the wrong side rows to plain knit instead of plain purl.

In The Knitter's Almanac the sweater is pictured with a matching bonnet, for which no pattern is given. As far as I know, EZ didn't publish that pattern, instead she describes how to add an extension onto the bonnet pattern you (of course) already have to keep the baby's neck and chest warm.

There don't seems to be all that many bonnet patterns to be had now, but this very girly sweater cried out for a bonnet, so I greatly modified the one that I have to make a matching bonnet. If it fits, and I can figure out what age of baby it fits, I will post simple directions.


Monday, February 07, 2011

Age and Babies

So far, I feel I’ve spent my first 36 years being told that I’m too young. I remember a point in elementary school when a friend two years older than me used the phrase “shake it don’t break it.” When I asked, “What does that mean, anyway?” she replied, “I’ll tell you when you’re older.” It’s amazing how much a ten year old has to lord over an eight year old. It became clear to me when I was older that her answer was really an indication that she didn’t know any more than I did. I still have no idea what that strange idiomatic phrase is supposed to mean.
When Cherie Brown, founder and executive director of the National Coalition Building Institute came to the university at which I work, she began talking about diversity by recognizing everyone in the audience for all the things about each of us that make us part of specific groups, whether they are groups that are classically thought of as oppressors or as oppressed. It was a great exercise. When each group was called, those who fit into it stood, and everyone else applauded. So for instance, I got to stand for categories like female, protestant, white, heterosexual, German (which may have been part of a group of northern European countries, I don’t remember) etc. When she got to age, Ms. Brown said, “It seems like we spend the first half of our lives wishing we were older, and the second half wishing we were younger.” How true it is!
I’ve mostly glided through life not worrying too much about my age. I think part of why I’m always being told I’m young is that I tend to hang out with people older than me, and I’ve always preferred to date a few years older. So several of my close friends are grandmothers, and my husband has half a decade on me. Of course I attribute my tendency to have older friends to my advanced intelligence and maturity; you may draw your own conclusions.
It’s at my university that I feel a bit persecuted for my allegedly young age. Not so much in my own department, but it is whenever I meet with faculty from other departments, or visit another department’s office, that I am asked “are you a student or a faculty member?” Or even worse, faculty members wheedle a number out of me and point out that their children are the same age, or a little older. I think someone in the fashion department actually said, “Well, I could be your mother.” I may be reading too much into it, but I really think this is a power play of some sort on their part. Maybe the ranking of grades and degrees in academia puts too much of an emphasis on the time put in, and not enough on the accomplishments.
I think it’s almost comical that at 36 these folks are trying to make me feel too young. In truth, I am too old to become a cop, too old to audition for American Idol, about twice as old as a retiring gymnast or figure skater, too old to have a first baby without very careful attention from doctors, and just recently, the proud owner of one pair of prescription bifocals, and one pair of pharmacy reading glasses. And yet, I got carded at a university event by someone at least 10 years younger than me. Yes, we have a lot of non-traditional students, so the average age probably trends a little high compared to the average, but still. My stepson is the same age as most of my sophomores. And yes, I am too young to have a kid his age, but see the earlier paragraph about the slightly older husband.
And so I am battling for some respect and recognition at work even thought I am “too young” and battling increasing age in the guise of weight gain and gravity and declining optical lens flexibility. The CDC says the average American life expectancy is 77.9 years. I’m nearly half way. Given that, plus the fact that I can’t wear a bikini anymore, I’d really like some recognition for everything I can do now that I couldn’t do back when I could still wear that two piece.
In an effort to garner some age-based respect, I’ve been practicing perching my new tiger striped reading glasses on the end of my nose. Now I look like Janine from Ghostbusters.
So I’m dipping my toes into middle age, and we’re all careening towards old age, but what I’m actually trying to come around to is the very youngest: babies. I don’t have much use for babies myself, they’re like needy potatoes with messy diapers, but people who have them seem very keen on them. My stepson and I met at the perfect time. He was 5, old enough to tell really good stories, especially since he was still too young to fully “get” the distinction between experienced events and imagined ones. He was cute and smart, could communicate, and could go to the bathroom on his own. Perfect. I was 22. Old enough to be legitimately interested in kids and young enough to dive into a relationship with him and his father without thinking ahead to how hard it is to have a teenager while still in one’s twenties. Perfect.
Now, I don’t mean to bad mouth the whole breeding thing. Yes, self-righteous stay-at-home moms who spend all their time lecturing everyone else on the internet (while their unsupervised children set the cat on fire) are annoying, but lots of people I know and respect really love babies. The day your child is born is momentous. The fact that they start out as a baby is immaterial compared to the importance of that day, the day they come fully into life and you come fully into parenthood. I didn’t get this back when I was younger, or was distracted or something, but for the last 5 or 10 years I’ve tried to really focus on being part of the community rituals that surround and celebrate the birth of a child. Births, weddings, graduations/confirmations/bar mitzvahs/coming of age, and deaths are the really major parts of life, epic and bigger than the work-a-day world. They are the framework, and the basis for much or our crucial spiritual moments. They are also the times when family and community mobilize, and are at their very best, fulfilling their most fundamental functions. I want to be part of that for my friends and family.
And so (you knew this was coming) I knit. I don’t seem to knit as many wedding presents, and I should get back to knitting prayer shawls for those in crisis, but at this point I do try to knit for everyone I know who is having a baby. It’s funny, now that I’m past childbearing age, and even thought I claim to have mostly older friends, I seem to know a ton of people having babies right now. It’s been that way for a few years.
Isabella's blanket
A few months ago I sent out this great, colorful blanket to a friend. She says the baby grabbed it right away and loved sticking her little fingers through the holes in the lace pattern. My friend Ann is great about knitting blankets for the babies in her life, and it was her great idea to make the little version, as something for the baby/toddler to hold onto while the big blankie is in the wash, or when the big blankie is too much to carry along on this particular trip to the grocery store, etc.
There are so many babies on the way right now, I had to make a list of who’s having the baby, boy or girl (if known) and what I plan to knit for them. Finished except for the buttons is this baby surprise for a baby of not-yet-known gender.
baby surprise
I love this pattern. This is at least the third time I’ve done one and it charms and amazes me every time. I love the way it looks with stripes, and I have no idea how Elizabeth Zimmerman ever thought her way around a garment in this direction. Just the fact that her line of shaping (decreases then increases) move from the back cuff, under the arm and onward to the bottom front hem is amazing to behold.
robot baby sweater

This is a great combination of things. I was on a friend’s Ravelry page, looking at these great robot mittens she had made, when Chris leaned over and said, “You should make a baby sweater like that for X’s baby, she’d love that kind of thing.” Thus I bought Kathryn Ivy’s Love Bytes mitten pattern and used her wonderful charts and a modification of a seventies baby sweater pattern to make this really delightful baby sweater full of robots and hearts. I totally love her pun, and the really blocky mid-twentieth century robots, and the idea of robots in love. This aesthetic is the same thing I love about the robots in Futurama—they’ve appropriate an older, dated, view of future technology, so it is both primitive/nostalgic and futuristic to our modern eye. Like the giant super computers in classic trek that take up a whole room and break down when Kirk tells them “everything I say is a lie, including that.” Actually, I think Kirk broke a sexy false eye-lashed female robot with that particular tautology, but you get the picture. I predict that ‘50s robots made out of cardboard boxes will be the next big thing after steam punk. And babies will be the recipients of my next 5 knitting projects.

Wednesday, August 25, 2010

Dear Internet Trolling Robots

I love robots, I really do. I read stories about you. I watch movies about you. I cry at the end of The Iron Giant every single time. I made a beer and called it "Benderbrau" because Bender did in an episode of Futurama. I've known the rules of robotics by heart since I was 9, see:
  1. A robot may not injure a human being or by inaction allow a human being to come to harm.
  2. A robot must obey any orders given to it by a human unless that order conflicts with the first law.
  3. A robot must not allow itself to come to harm unless doing so conflicts with the first or second law.

But, internet trolling robots, you need to respect that this is a (mostly) knitting blog. I support robots knitting and knitting robots. I encourage on topic comments. If any knitting robot has comments, questions, or experiences to share, by all means do. If anyone who is knitting a robot wants to discuss their project, especially whether circuit boards function better in ribbing or lace, by all means share.

But robots peddling viagra? You are not welcome. That will never be an on topic comment on this blog. I'm terrified to think what happens when a robot takes any such medication. Neither do I need internet trolling robots stopping here to share information on how to chat online with naked foreign women. Again, why would you be interested in such things?

So this is a direct order, from a human, to all robots: Do not post comments here that are off topic, or that you wrote late at night after your english language circuits had shut down for routine maintanance. Do not start with badly worded compliments to my blog, even if you carefully inserted the 4 most frequently occuring words and tags, only to continue with an add for "male enhancement." Not only is this off topic, it's not what knitters are looking for on the internet. It may be what everyone else is looking for on the internet, but not us. What we're looking for is a pattern for a hat that fits a 9 month old and is covered in bunnies, or a good source for polwarth wool that can ship tomorrow, or an answer to whether or not it's a good idea to knit lace in 100% alpaca. When we see naked ladies online we feel bad for them and cast on a sweater.

You have been ordered. From now on no robot may post any off topic comment here unless doing so prevents a human from coming to harm. Even so, it will be deleted.

Monday, August 23, 2010

Spinners guild reveals reasons ‘why ’

This was a really nice article published in the local "Bee." Unlike the Buffalo News reporter who interviewed many of the same people and got much of the information wrong, Naomi Spencer was really lovely and attentive, and wrote an accurate, interesting, and articulate article about our local spinning guild.

Spinners guild reveals reasons ‘why ’

Wednesday, August 11, 2010

Knitting and Beer, What Could Be Better?

I was recently asked, by a very young reporter, how long it takes to make something if you start by spinning the yarn. There are of course 2 answers to the question. There is the answer in hours, and there is the answer in years. Interestingly, these 2 answers do not work out to the same amount of time.

Case in point: I have finally finished my purple sweater set. Upon our third summer together, my friend Rachel looked at me working at my spinning wheel and said "Isn't that the yarn you've been spinning the entire time I've known you?" Lucky for her, I wasn't at a good point to let go
and throw my niddy noddy at her.

finished sweater set!

How many hours did this set take? Well, I started with white roving: 2 pounds of wool and 9 ounces of silk. I spent a day dying the wool in 4 separate shades of purple and painting the silk
in the 4 shades sequentially. The most time consuming part was that I then hand carded the 4 shades of wool into heathered rolags before spinning them. The combination of carding and spinning may have taken as much as 200 hours. It felt like longer. Then I knit 2 sweaters, that probably took about 100 hours (these are hugely estimated numbers). I think I spent about 10 hours making the lovely dorset buttons. So all told that would be 310 hours and a day.

dorset button

How many years did this sweater set take? Well, as best as I can remember I started in the summer of 2002 or 2003 when I bought the wool in Delphi NY. I finished this past June. That's 7 or 8 years to complete a sweater set. Over those years I had 3 different "school year" jobs. We went through 4 costume directors at the Opera. I lived in 4 different cities/towns, had 4 apartments, got married, and bought a house. That's way more than 310 hours and a day.

After finishing in June, I figured I would put the set away until December, but we had such a weird summer that I wore it on July 1st and was quite happy to have it. Since that day it's been over 80 every day.

There have, of course been other projects during that time. In fact, anything on this blog or on
my Ravelry page was made during that time. Plus there's all the other hobbies.

I love when my very different interests in some way intersect, overlap, or inform each other. Like how the garden feeds the rabbits and the rabbits supply the compost that feeds the garden. And the spent grains from brewing feed the compost feeds the hop vine makes beer. Or when Queen sings about relativistic time dilation. Or how when a math/science student takes costume construction I can point out that the balance points on a sleeve head are the 2 points on the curve where the second derivative equals zero. And now I have a new one: a knitted beer label.
This goes way past drinking and reading while knitting for relevant hobby interaction. Check it out:

I'm quite pleased with the result, although I had to save it from an unfortunate earlier stage where the lemon looked like a cupcake. Some of my labels fall flat, but I've made a few in the past year or so that I'm really pleased with. The beer was good too.

Friday, July 30, 2010

I've Finally Done It

After years of planning and writing patterns down and then chickening out, I've finally put up a group of patterns for sale on the internet. Anyone can now knit or crochet a recycled t-shirt rug just like the ones I sell on Etsy and use in my home. You can buy one through the Etsy link in the left side bar, or through Ravelry by clicking this button: Why all the hesitation and procrastination? Well, I hate selling stuff. I still remember everyone who yelled at me when I worked retail, and that was selling stuff whose workmanship or undiscovered mistakes were not my responsibility. Now I'm putting stuff out there that I made. I am now directly responsible to the buyer. The biggest thing that gives me pause about all of this is that I know that some women can be really nasty, especially about buying things and especially about a perceived slight. There are women out there who will try to take down a dyer's entire business because they bought 2 different hand dyed rovings and felt they weren't a close enough match. I don't need that. I'm not sure what's wrong with us as a gender. It seems like a man who felt he hadn't gotten what he paid for would yell once, or punch once, or (in the case of the internet) post one angry comment, and then forget about it and go on with his life. Whereas a woman who feels cheated, at least one of the nastier ones, can spend weeks, months, or years stewing in that emotion and actively working to take down someone's entire business or even their life.
This idea isn't new to me. Look at all the stories of teenage girls whose boyfriend was "stolen." Read "The Help" by Kathryn Stockett. No really, go read it. It's a great book. I'll wait here.

* * * * *

That one shows that it's especially bad to cross a rich white southern woman with nothing else to do.

So how did I finally overcome all this adversity and post the damn pattern? Well, I've now sold 8 handmade items on etsy and no one has demanded a refund. Over 30 people have knit the 2 free patterns I posted here on the blog and linked to from Ravelry. A few have asked me questions and all seemed to be able to finish successfully with the answers. One found a mistake in the
pattern and pointed it out in the nicest way possible. No one died. No one even yelled at me. I hate being yelled at by strangers.

So I've taken the plunge. Four people have already marked the pattern as a favorite on Ravelry and 5 have viewed it on Etsy. We'll see if anyone buys.

Thursday, July 16, 2009

3 Steps Forward, 2 Steps Back

It's been very busy here at the opera, but I have had at least a little knitting time. I've finally finished spinning the purple yarn I've been making for as long as Rachel has known me (she so kindly pointed out this summer) and have started knitting it into a sweater set. I often make my own patterns, which certainly carries it's own satisfaction, especially for those of us picky about fit, but for this set I had planned to use a pattern I already own in a 1950 knitting pamphlet. I think I had intended to spin the yarn to match the gauge given in the pattern (not sure, as my intention dates to about 2006) but while all of the balls of yarn are fairly consistent* with each other, they are not, in fact, the right grist for this pattern. So I had to do a very small rewrite of the existing pattern to match my actual gauge. Still faster and easier than writing the whole pattern, right?

This is how far I got under that plan:


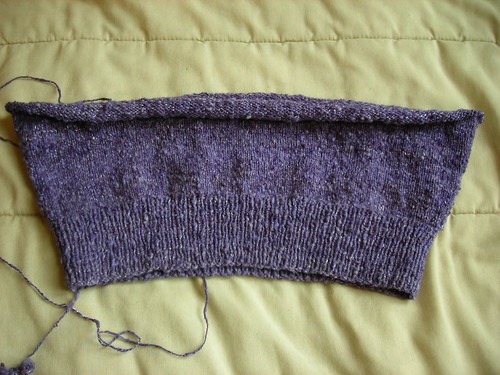
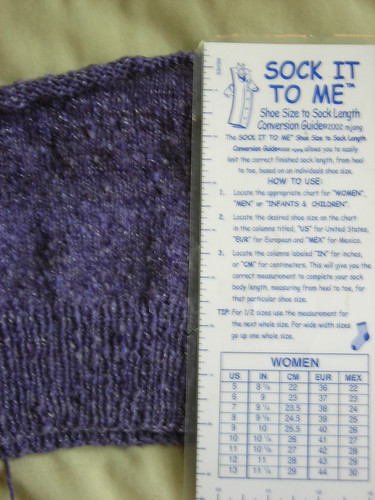
Knitting in the round affords lots of chances to try on a garment as it's being constructed, and correct errors well before the end. This was my try-0n point, the point at which I instantly regretted second guessing my original instinct to knit 5" of ribbing. The pattern (authentic 1950 you recall) only called for 3" of ribbing, and although I knew better, I deferred to the pattern at 3" because I was sick of knitting 1x1 rib. Also, the body increases were too close together and the body itself a bit looser than I had hoped for (or indeed than they appeared on the model).


So instead of keeping 8" of the wrong thing, finishing it and hating it forever, I ripped out 5" of body back to the original 3" of ribbing.

Discouraging to do, but from this point I knit the additional 2" of ribbing I should have started with, and reworked the body shape and size to something much more flattering. At this point I've rewritten the pattern extensively, almost equivalent to just writing my own in the first place. Almost. I'm still trying to mimic the look and shaping of the original, but fit my non-1950-model-body.


* As a point of fact, I am incredibly proud of how consistent my grist is on 2 1/2 pounds of fine yarn spun here and there over a 3 year period.