I was recently asked, by a very young reporter, how long it takes to make something if you start by spinning the yarn. There are of course 2 answers to the question. There is the answer in hours, and there is the answer in years. Interestingly, these 2 answers do not work out to the same amount of time.
Case in point: I have finally finished my purple sweater set. Upon our third summer together, my friend Rachel looked at me working at my spinning wheel and said "Isn't that the yarn you've been spinning the entire time I've known you?" Lucky for her, I wasn't at a good point to let go and throw my niddy noddy at her.
How many hours did this set take? Well, I started with white roving: 2 pounds of wool and 9 ounces of silk. I spent a day dying the wool in 4 separate shades of purple and painting the silk in the 4 shades sequentially. The most time consuming part was that I then hand carded the 4 shades of wool into heathered rolags before spinning them. The combination of carding and spinning may have taken as much as 200 hours. It felt like longer. Then I knit 2 sweaters, that probably took about 100 hours (these are hugely estimated numbers). I think I spent about 10 hours making the lovely dorset buttons. So all told that would be 310 hours and a day.
How many years did this sweater set take? Well, as best as I can remember I started in the summer of 2002 or 2003 when I bought the wool in Delphi NY. I finished this past June. That's 7 or 8 years to complete a sweater set. Over those years I had 3 different "school year" jobs. We went through 4 costume directors at the Opera. I lived in 4 different cities/towns, had 4 apartments, got married, and bought a house. That's way more than 310 hours and a day.
After finishing in June, I figured I would put the set away until December, but we had such a weird summer that I wore it on July 1st and was quite happy to have it. Since that day it's been over 80 every day.
There have, of course been other projects during that time. In fact, anything on this blog or on my Ravelry page was made during that time. Plus there's all the other hobbies.
I love when my very different interests in some way intersect, overlap, or inform each other. Like how the garden feeds the rabbits and the rabbits supply the compost that feeds the garden. And the spent grains from brewing feed the compost feeds the hop vine makes beer. Or when Queen sings about relativistic time dilation. Or how when a math/science student takes costume construction I can point out that the balance points on a sleeve head are the 2 points on the curve where the second derivative equals zero. And now I have a new one: a knitted beer label. This goes way past drinking and reading while knitting for relevant hobby interaction. Check it out:
I'm quite pleased with the result, although I had to save it from an unfortunate earlier stage where the lemon looked like a cupcake. Some of my labels fall flat, but I've made a few in the past year or so that I'm really pleased with. The beer was good too.
La Traviata is in it's final orchestra dress rehearsal tonight. Glimmerglass has a tradition of putting full sets, costumes, and lights on stage much earlier in the process than most opera or theatre companies would. The advantage of this is that the designers can continue to refine their work to a much higher level and designers and director can better take inspiration from each other's work and react to it. From a costume point of view it also gives us even more time to custom fit the costumes we make for the singers.
The disadvantage to this schedule for us in the shop is that we have about half the "standard" amount of time from the point at which we do a first mock-up fitting to the point when we need to put a wearable costume on stage. This year we did that in about a week and a half instead of the customary four weeks. So we find ourselves needing to make design and fit changes to garments we're still scrambling to finish. The challenge is to continue to work to Glimmerglass's high standards while making these deadlines.
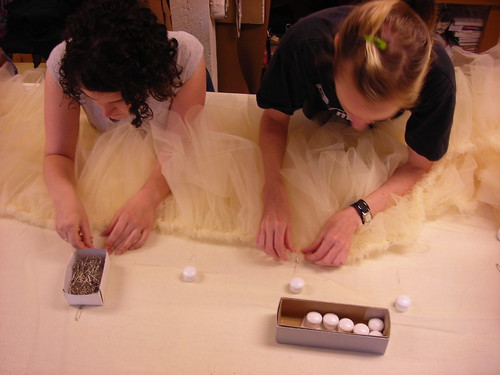
One of the most time consuming costume details my team has created this summer is a skirt made of layers and layers of tulle, covered in tiers of tulle ruffles. (If you've forgotten, tulle is a soft net, most available in nylon.)
The numbers involved in this project (and remember they all translate to many hours of labor) are truly impressive. The inner layers which support the skirt include 8 layers of tulle, each of them 10 yards (30 feet) around. That took most of a 50 yard bolt of tulle. The ruffles are gathered onto a tulle base. In most fabrics a ruffle twice as long as the base to which it's sewn would look plenty full. Tulle has an amazing ability to gather, so a traditional 2:1 fullness looks less than skimpy. We ended up using a double layer of tulle for the ruffle, and gathering it 8:1 at the bottom, slightly less as the layers move up the skirt.
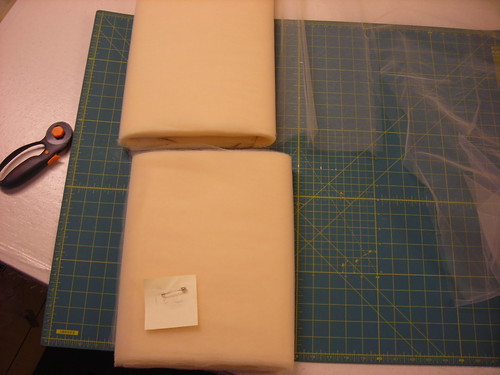
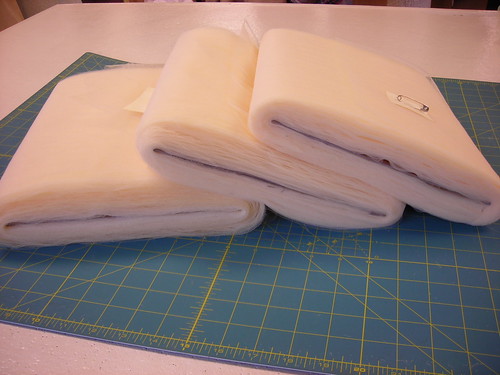
I cut the tiers by neatly wrapping the full yardage around a long cardboard card. Then I cut the correct tier depths through all the thicknesses with a rotary cutter. This probably saved hours of time over marking and cutting 13" from the bottom edge of 40 yards of net, then going back and doing it again for each of the rest of the 5 tiers.
The cardboard in the middle definitely made this process easier.
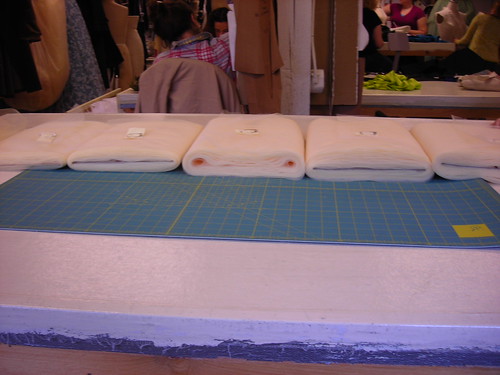
As mentioned, the tiers get fuller as they go down the skirt, which you can see by the varying thicknesses of the wound and cut net. The topmost ruffle is on the left, the bottom on the right.
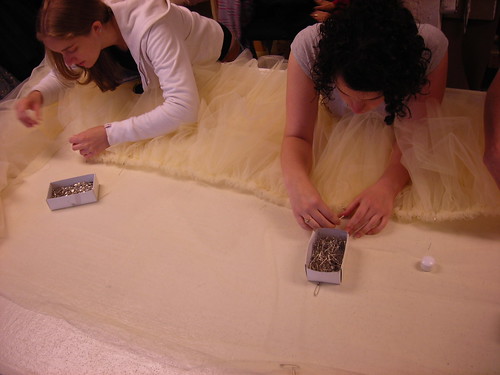
At least a half dozen costume technicians worked to gather, pin, and sew the tiers down to their base.
The finished skirt includes 220 yards of ruffle, all cut, gathered, and assembled in just a few days. That's on top of the 80 yards of tulle that hold the skirt out in its full shape. The hem underneath the bottom ruffle is held out to a circumference of over 3 yards by all of that tulle. I'm quite pleased with the final results, and my fantastic team!
Back on Chinese New Year, I was involved in some nutty spinning at Linda's shop. Please do check out the full description, complete with pictures, here at Mary Ellen's blog.
Basically, we all brought 3 oz of ready to spin fiber with us, not knowing what exactly would happen to it, only knowing Linda would provide another 3 for each of us so that we went home with 6. I had some idea that I would blend what I brought together with something of Linda's and bring the results home. boy are my ideas simple!
Instead, we combined all of it. Yes, ALL. We started layering our fiber (mostly dyed wool) across a big table. Once that was spread around, out came the surprise, a bag of the craziest items you ever did or didn't think to include in yarn. Stuff like silk waste, dyed cotton balls, angelina fiber, very fine wire, feathers, strips of fabric, bits of yarn--craziness. After that was spread around, we would add another layer of the more conventional wool and dyed locks, then another layer of "spinny bits" as Donna called the crazy stuff, then more wool, etc, until it looked more or less like this:At which point we had to get it off the table. We rolled it up like a jelly roll, and then sliced the jelly roll into rounds, one for each spinner. The rounds didn't particularly hold together, not like a roving or anything so mundane, so I carried home a big paper bag of assorted fluff and nonsense, ready to figure out how to spin it. I spun by pulling handfuls out of the bag. I found it best to alternate between drafting what was between my hands and then letting go with my forward hand, so that the twist would travel back into the fiber supply, then draft again from there. Yes, I let the twist into the fiber supply. You've been told not to do that, haven't you? So have I. I usually don't. But I found it much more helpful to let the twist select the next combination of fibers to pull into the yarn. When I tried to draft more consistently (and conventionally) I was constantly pulling apart the unrelated bits of fluff in my hands and then having to join them back on to the yarn. It's not easy to join a piece of fabric, a bit of yarn, some wool, and a feather onto the already formed yarn while treadling and trying not to drop the rest of what's in your fiber supply hand. Since the actual roving was the easiest thing to join on, I kept grabbing more of it and not getting much of the other stuff in. That's when I realized that letting the twist travel up to grab it's own next batch of stuff, similar to a long draw, would best keep my yarn together and evenly select a bit of everything from the fiber in my hand. Spinning this stuff was not about making thin yarn, or making even yarn, it was back to that first day I learned to spin, it was just about making yarn: fiber that held together with twist. Holding together, that first and foremost goal, was my only goal. I ended up with this: I had 6-8 oz. Too much for a hat, not nearly enough for a sweater, and frankly, I wasn't sure if I would ever wear it. I mean, I like color, and am not afraid to combine colors, but I do still like it if the finished piece has a describe-able palette. And I count "rainbow" as a palette. I'm pleased just knowing that the yarn held up to being knitted. The finished project is a mobius scarf--the kind you knit on a circular needle starting in the middle and working toward the edge.* (Yes, not only does a mobius have only one side, it also has only one edge.) Mind boggling, but after making one like this, watching it form, I have an even deeper understanding of how the things work. (For those of you who didn't grow up with a science teacher father who encouraged you to play with mobius strips instead of toys there is a good explanation here and a video including some of the things Dad showed my brother and I that one could do with mobius strips here. Yes, we were raised to be dorks. I only wish I had thought to make the video. Dork!) If I were to make this kind of yarn again (and it's intriguing enough and surprising enough that I probably will) there are a few thing I would do differently. #1 I would start with some sort of a color pallet, however broad. #2 I would ply it. I spun this one as a singles because it would have looked terrible plied, but it would have been much stronger if I had plied it against something else. Next time I'll try to ply against a sewing thread, so that the thread acts as a binder to stabilize the whole thing without losing the look of the singles. #3 I felt that some of the "spinny bits" didn't add anything to the finished yarn, and/or were too difficult to work with to be worth using again. I loved the way the silk waste looked, and the angelina, and the wool locks, along with all the spinnable fibers we blended with, but I felt like the fabric and yarn bits didn't add anything and actually weakened the yarn in places. The cotton balls were just a pain without adding anything discernible to the texture. The feathers and metal are uncomfortable in the scarf and sometimes poke me.
I hear a rumor of an upcoming workshop to do the same thing, but only in natural fiber colors. I hope I'm in town for that workshop, it could make for some really beautiful yarn!
* The procedure was printed in a magazine a few years ago. I don't remember which one, and am away from my back issues at the moment, but I'm pretty sure it was either Spin Off or Interweave Knits.
**The cardigan I am wearing in Mary Ellen's process pictures is the one that had tea spilled on it during my flight and was then shat on by a bird during my first walk in DC. It came clean, no problem, and has been safe from calamity since then. Too bad I appear (at least from those pictures) to be outgrowing it.
Since Chris and Erica are always working on something, it seems like a good theme for Knitting with Fire would be to talk about current projects. We'll see where it goes.


 I'm quite pleased with the result, although I had to save it from an unfortunate earlier stage where the lemon looked like a cupcake. Some of my labels fall flat, but I've made a few in the past year or so that I'm really pleased with. The beer was good too.