Monday, January 06, 2020

My first year growing luffa in a cold short season (zone 5b)

Note:  if you are hoping for sure-fire how-to information on successfully growing luffa in a short season, look elsewhere, or come back here in a few years.  If you are experimenting, and want to read about how my first year of experimenting went:  wins, losses, and plans for next year, then read on!

My primary goal is to grow enough mature gourds to supply luffa scrubbers for my own bath and dish scrubbing needs, plus gifts.  If up until this moment you thought the natural luffa in your shower was a sea creature, not a plant, don't feel bad--that's what most people think.  Luffa or loofah is a vining gourd related to cucumbers.  They grow in more tropical parts of Asia, which is why learning to grow them outside of Buffalo New York will be a multi-year challenge.

I started from seed.  After reading lots of conflicting information about how far ahead to start the seed indoors, I decided that experiment #1 was to determine the best indoor start time.  I started the first plant in mid January, the second mid February, and the third mid March.  My final frost date is May 15th, so that was 4, 3, and 2 months before the first frost.  For all three plantings I nicked the side of the seed with a nail clipper and soaked overnight before planted in a peat pot filled with potting mix.  I kept the peat pot on a heat mat and under a clear plastic dome until germination.  Once the seed germinated I moved the peat pot off the heat and directly under flourescent light.  I had 100% germination.  Success #1!

I followed my usual routine for planting out into the vegetable garden.  I mulch all of my beds heavily with chopped leaves in the fall.  By spring that layer of leaves has gone down quite a bit, usually to 2-4" of mulch.  For the luffas, 3-4 weeks before planting I raked back the leaf mulch to help the bed warm up in the sun.  2 weeks before planting I spread a 2" layer of screened compost on top of the bed.  I don't work anything into the soil and I don't till.

I planted out all three seedlings in an 18" diameter x 5' tall tomato cage a week before my last frost date and then re-mulched with the fall leaves.  The forecast showed no more frost for the next 2 weeks.  This was mistake #1.  All three plants shriveled, turned brown, and nearly died.  Clearly these tropical plants need more warmth than just a lack of frost.  While they did survive, they were stunted and didn't get any bigger for at least a month.  Planting out early put them behind.

They did eventually grow and start climbing up their tomato cage, and across the neighboring bean cages.  They made beautiful, short lived yellow flowers that the bumblebees loved success #2.


They seem to make male and female flowers like zucchini do, with the male flowers growing first and just being flowers, while the female flowers eventually grow a little gourd at their base.  The little gourds got a little bigger, and a little phallic.


they got a little bigger and less startling...


As we got closer to the fall frost--mid October here, it became clear that there was one fully mature gourd, a half dozen that might become mature, and another half dozen medium sized gourds that were to small to become bath sponges.  Happily, luffa is edible!  I searched online and found several thai recipes for stir frying luffa with fish sauce and eggs. 


I picked all the smaller gourds and followed the recipe.  They were delicious!  This was definitely success #3--a tasty meal from the garden.  They have a mild flavor and a satisfying texture.  The meal was filling and yummy served over rice.

According to the internet, at the end of season the gourds will dry and turn yellow brown on the vine.  When the first true frost came, even the largest gourd was still green.  So I left them.  The plant died after the first light frost.  So based on that and mistake #1, its safe to say that this is a plant that does not tolerate cold.  That's conclusion #1.

At this point I ran experiment #2.  I cut two of the almost mature gourds off the dead vine and hung them in a mesh bag in the basement, but left the fully mature gourd and 3-4 almost mature on the dead vine to compare the two drying methods, indoor or out.  Once a month or so I peeled one of the almost mature gourds on the outdoor vine.  There wasn't a sponge inside, just a dead slightly overgrown cucumber.

By Christmas both the outside and inside gourds had browned and dried, and seemed to have stopped changing significantly.

Here's how the big guy looked just before Christmas:


Close up of the skin.  Is it dry or rotten?  Only one way to find out.


On the left are the two that dried in a hanging mesh bag in the basement, on the right the final two that dried outside on the vine.  They all feel fairly dry and crispy on the outside.


The less mature gourds were a pain to peel, and didn't yield anything useful.  Yes, they were old fibrous gourds, but they weren't fibrous enough to be sponges, just sort of rotten.


But the big guy should work.  It isn't as lovely and fine grained as the luffas I've bought, but I sent it back to the basement to dry some more without it's skin.  The seeds inside looked mature until I remembered that the original seeds I planted were thicker and black.

So here's what I learned and how I'm going to use that knowledge going forward:

conclusion #1 Luffa can't take any cold.  Waiting until hard frost is over isn't enough.  Next year I need to plant them into warm soil, like I would do with tomatoes or peppers.  Last year I had great success planting out my tomatoes and peppers early, but inside water cloches (like Kozy Coats, or Wall-o-Water) so I will try doing the same, and at the same time with the luffas.

conclusion #2  Planting 3 luffa in a tomato cage with other climbing apparatus nearby seemed to work well for them.  They only took up 3' x 18" of planting space in the bed.  That's worth it even just for the one meal and one sponge I got this year.  I will give them the same amount and kind of space next year.

conclusion #3  No conclusive data on best seed starting date.  The most mature gourd came from the February start date, but the January seedling had been damaged early on by spider mites and everything else about the three vines seemed pretty equal for most of the growing season.  I will run experiment #1 again next year using the same parameters.

conclusion #4  Once the vine was dead, there wasn't much difference between the gourds dried inside and those dried outside.  The goal would be to make the right changes next year so that several gourds can fully mature and dry on the vine BEFORE the first fall frost.  Which leads to:

conclusion #5  I suspect that even if everything else goes perfectly, my season may be too short to reliably get this variety to fully mature and dry on the vine before frost.  As I looked through my records I see that I planted a 120 days to maturity variety of Luffa.  Looking through this year's seed catalogues, I found a 90 day variety offered.  So I am going to plant that variety next year.   I realize that changing the variety is crap science, effectively negating the other conclusions, but I contend that my crap science is still decent gardening.  So I am putting experiments with this variety on hold to start over with the new quicker maturing variety.  I'll run experiment #1 again on this variety, keeping my seed starting technique the same.  I'll plant out into warmer soil with more protection, as it's very likely this will benefit the new variety as it would have the old, and I'll learn from there.  Perhaps the next experiment will be to plant both varieties in the same year and compare them side by side.  I can even do a taste test!


Monday, March 27, 2017

What Survives the Winter


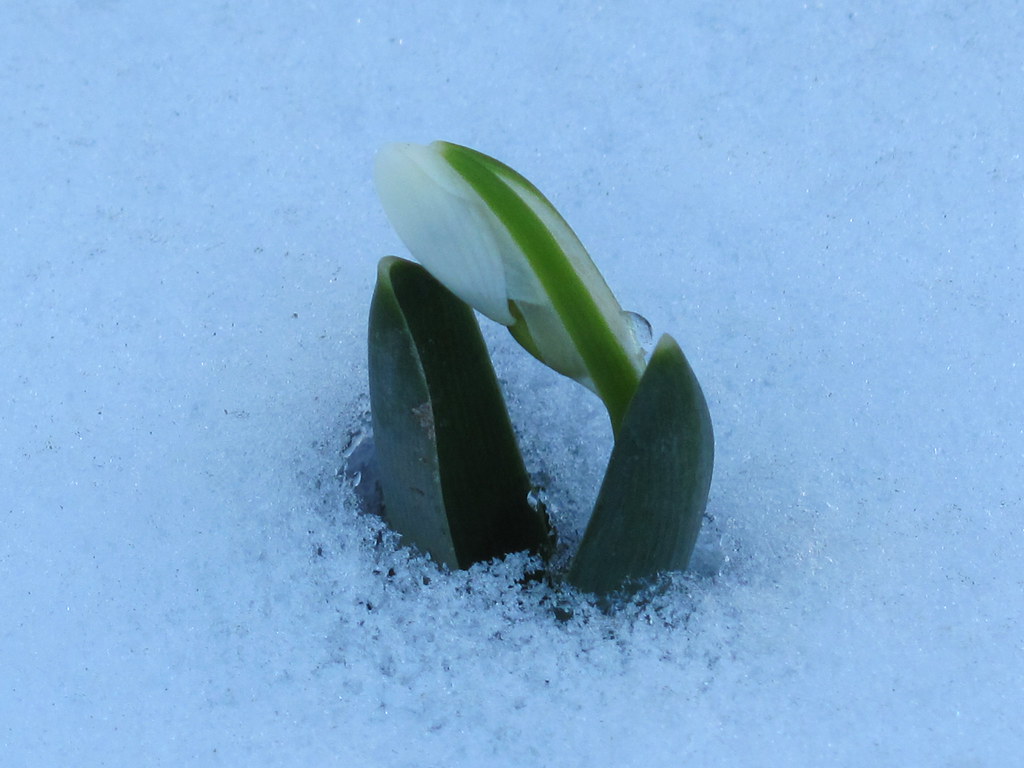
I love snow drops.  They are the earliest blooming flower I know of that grows in my climate.  They bloom so early that they often have to poke up through not only soil, but also snow to make their first appearance.  You may measure by day length, temperature, or the return of the robin, but for me these little flowers deliver the promise that winter will end, and spring is coming.  I have made it through another winter.

My yard is full of signs that winter has really finished, and we can truly believe that spring is here.  Lots of plants are sending up their first shoots or forming their first buds.  


These alien red knobs will grow into clusters of rhubarb leaves.


On the left, the leaves and flower buds of my Lenten Rose.  It has 3 more weeks if it's going to open those flowers during lent this year.  On the right are the first flower buds to turn white on my pieris japonica.

I've been playing with techniques to extent my vegetable harvest into the winter.  My ultimate goal is to be able to keep harvesting fresh veg throughout the entire year.  Much of what I grew undercover this year we ate for Christmas dinner.  Some of what was left succumbed to the cold, but there were some survivors.  

The lettuce I grew in a cold frame only survived until Christmas dinner, which was my goal for it.  Most lettuce is too tender to make it through my zone 5 winter, even in a cold frame, and I hadn't planted winter hardy varieties, just a general mix.  Even so, it was a delight to open the frame and find that from that mix one arugula plant and what I think is frisee, have survived.  I gave them compost and then planted new tender lettuce greens around them.  While the soil in the exposed parts of my garden is still much too cold and sodden for planting, the soil inside the frame is ready.  The rest of the garden will most likely not be ready like this until the middle of April, so even though there isn't exactly a meal in here, by leaving the cold frame in place all winter I'll be harvesting baby salad greens from what I just planted by the end of April.


I also covered one garden bed with a mini hoop tunnel for the winter, and filled it with hearty winter greens.  Interestingly all of the arugula in here died in January or February, as did the tatsoi and some of the kale.  My favorite cooking green, red giant mustard, did great this winter, as usual.  It's the green and purple leaves in the front of this pic, with some of the kale (yellow brown around the edges) in the background.

This is the hoop tunnel with the plastic pulled back for planting:


I raked back the leaf mulch from fall, spread an inch of compost, raked back the mulch and planted rows of early greens, with mulch mounded between them.  The trick now is knowing when to cover the tunnel fully with plastic to keep the seedlings warm, and when to vent or even fully uncover during the day so that they can get full sun.  On a warm day the tunnel will get too hot and fry all the little seedlings inside, or so I've read.


This is only the second winter that I've used the tunnel, so I am still experimenting with varieties, hardware, and planting times to optimize my late fall and early spring growing.  I have big plans to expand my veg production through next winter and to make it easier to harvest in snow.

Sunday, November 06, 2016

Erica's Science Corner: Grow Lights or Proof I Should Have Listened to My Dad In The First Place

For me, starting seeds indoors has had a steep learning curve.  I've improved my soil mixture, watering techniques, and started sterilizing my pots in bleach  before using them, all of which led to a moderately successful batch of seedlings last year.

My father advised me to use shop lights and regular florescent bulbs like he does, but not having the time or tools to build a wooden stand for the lights, I thought I would save myself the trouble and buy really expensive grow lights that come with their own stand.  They haven't been everything i hoped for.  My seedlings seem smaller than they should be, and the lights fall off the stand every third time my arm brushes up against it.

Since starting, I've seen some great set-ups online using wire utility shelves to hang shop lights above rows of plants.  I wanted to double my growing space this year, so I bought a utility shelf, a shop light, and LED bulbs for less than half the cost of those fancy grow lights.


I still worried that the shop light wouldn't work as well as the official grow lights, and had no idea if LED was a good idea, so I set up an experiment.

Two identical flower pots, with equal amounts of the same potting mix and a teaspoon of micro green seed mix planted in each.  I like using micro greens when I'm testing a new procedure or potting mix because they germinate quickly and grow well.  Plus I can eat them any time of year.

I was careful to keep the lights at the same height above the pots and to water equally.  The only variable was which light each pot was under.

The pot on the left was under the grow light, the right was under the LED shop light.


It isn't night and day, but there's a distinct difference.  The shop light with the LED bulbs is the clear winner.  Science has proven that I should have listened to my Dad (the science teacher) in the first place.

Anyone want some used grow lights?

Wednesday, October 19, 2016

Vegetarian Stuffed Peppers


These are protein packed and satisfying vegetarian stuffed peppers.  Leave out the cheese, or use a substitute and they can easily be made vegan.

Preheat the oven to 375.  In a small casserole dish (about 6 x 9) combine
  • 8 oz package of tempeh, crumbled
  • 1 1/2 Tbs olive oil
  • 1/4 tsp salt
Bake at 375 for 20 minutes, stirring occasionally, until tempeh is brown with crispy edges.  Leave the oven on after removing the tempeh.

Meanwhile, rinse
  • 1/3 c quinoa
  • 1/2 c brown lentils
Add to a rice cooker along with
  • 2 1/2 cups water
Cover, and cook the quinoa, lentils and water in the rice cooker until finished.  Coat a 9 x 12 casserole dish with olive oil.  Remove stems and cut in half

  • 4 bell peppers
place the halves, cut side up, in the oiled casserole dish and set aside.  In a large pan, saute until transluscent

  • 2 cloves garlic, minced
  • 1 onion, chopped
Add
  • 3 tomatoes, about 2 cups, chopped, or 15 oz can of chopped tomatoes
  • 2 tsp dried oregano
  • 2 tsp dried basil
  • 1/4 C fresh parsley
  • salt and pepper to taste
Cook, stirring often until the tomatoes have softened and the mixture has become juicy.  Add the tempeh and the mixture from the rice cooker when they are ready and stir well.  Turn heat to low and stir in
  • 1/4 grated parmesan
Remove from heat and spoon mixture into pepper halves.  For some extra cheesy goodness, get
  • 8 ciliegine--tiny balls of fresh mozzarella
poke one into the center of each stuffed pepper.  Bake the stuffed peppers for 20 minutes, or until they are heated through and the pepper cups have begun to soften.

Serve and enjoy!


Sunday, October 09, 2016

Portobello tempeh Rueben

In order to improve my health and lose weight, I've changed my diet following the guidelines in the book "Always Hungry?"by Dr. David Ludwig.  I'm eating whole foods with more fat and protein than I was used to, low glycemic indexes, and no sugar or sweeteners.  I feel great and love what I am eating!

I love the tempeh Rueben sandwich that they serve at The Autumn Cafe in Oneonta NY.  This is a way to combine all of those great flavors without the bread, and to do it on a grill in good weather!  In winter, just do the same thing on a baking sheet in a 350*F oven.  Year 'round tasty-ness.

Use 4 or 5 large portobellos when serving these as a main course.  Use smaller portobellos to serve as an appetizer or side dish.  These are very filling!


Serves 4 as a meal, more as an app or side

Preheat grill or oven to 350*F.

Cut into thin strips

  • 8 oz tempeh
In a cast iron pan heat
  • 1 Tbs olive oil

Spread the tempeh strips in a single layer in the pan and fry for 5-6 minutes, until the underside has browned.  Then turn and fry the second side until brown.  Add more oil to the pan if needed.  Drain on a paper towel and set aside.

Brush both sides of
  • 14 oz portobello mushrooms, stems removed
with
Brush surface of grill with olive oil, or if using an oven, line a baking pan with parchment paper.  Once grill/oven is up to temperature, place mushrooms gill side down on grill or baking pan and place pan in oven.  Grill/Bake for 5-8 minutes, or until the mushrooms begin to soften but still hold their shape.  Turn mushrooms gill side up and top each one with
  • scoop of sourkraut about 12 oz total
  • sliced tempeh
  • Russian dressing (I use close to the whole recipe for 14 oz of mushrooms)
  • sliced Swiss cheese 8-10 oz total
Grill/bake until the toppings are hot all the way through and the cheese has melted.  Another 5-10 minutes, depending on the thickness of your mushrooms.


Tuesday, October 04, 2016

Russian Dressing, Homemade and Sugar-Free

Traditional Russian dressing is often packed with sugar.  This is an easy to make, healthier, sugar-free version.  An immersion blender makes homemade dressings a breeze, but if you don't have one you could also do this in a traditional blender or even whisked together in a bowl.


Makes approximately 1 1/3 cup.

In a 1 pint wide mouth canning jar, or in the measuring cup of an immersion blender, combine
  • 1 c sugar-free real mayonnaise.  I use a variation of this recipe
  • 1/4 cup tomato paste
  • 4 tsp prepared horseradish
  • 1 Tbs minced shallot
  • 1 tsp hot sauce
  • 1 tsp Worcestershire sauce
  • 1/4 tsp sweet paprika
  • 1/4 tsp salt
Blend with immersion blender until thoroughly mixed.  Refrigerate for at least one hour, but preferably a day before using.

Monday, April 25, 2016

Chickpea Cheddar Biscuits


I've been experimenting with several recipes to make a really good grain-free biscuit.  There are other cheddar biscuit recipes out there, but I believe this to be an improved version.  I love to eat these with soup, or split in half and use them for a breakfast sandwich or in place of the English muffin with eggs benedict.

Chickpea flour is the same thing as garbanzo flour or gram flour or besan.


Makes 5 really hearty biscuits.

Preheat the oven to 500*F  Butter a 6"-7" oven safe dish or ramekin.

Combine in the bowl of a food processor:

  • 1 C chickpea flour
  • 1 1/2 tsp baking powder
  • 1/4 tsp baking soda
  • 1/4 tsp salt

Pulse a few times to mix.  Cut into approx. 1/4 pieces and add to the food processor:

  • 2 T butter

Pulse 8-10 times to incorporate the butter.  You may still see small chunks of it, and that's ok.  Pour the contents of the food processor into a medium sized mixing bowl and add:

  • 1/2 C buttermilk or yogurt
  • 1 C shredded sharp cheddar

Stir with a rubber spatula until you have a consistently wet, sticky, lumpy dough.  Place about a 1/4 cup of chickpea flour in a bowl and line up the bowl of dough, followed by the bowl of flour, and then the buttered oven safe dish.  Use a 1/4 C measuring cup to scoop dough out of the first bowl.  Drop it into the flour and roll it around to coat, then toss it gently from hand to hand over the bowl to shake off any excess flour.  Place it into the buttered dish.  Continue with the rest of the dough, arranging the biscuits touching each other in a circle in the dish.  You'll make about 5 balls total.

Bake in the 500*F oven for 5 minutes, then turn the temperature down to 450 for an additional 12-15 minutes.  They are done when golden with some browning on top, and cooked all the way through.  Turn out onto a plate to cool, and break the biscuits apart when cool enough to handle.


These are a bit too crowded in only a 5" dish.  If you make a double batch, a 9" pie plate will hold them perfectly.

Sunday, August 24, 2014

Whole Wheat Sourdough Bread

Updated 7-7-20 as I have learned that a little more kneading makes a less crumbly bread, you can freeze dough, and a more active starter makes a better bread.


Whole Wheat Sourdough Bread--simple recipe first, long version is after

Remove starter from refrigerator at least two feedings before use.

Mix together in a medium sized bowl:

1/2 c starter
1 1/4 c filtered water
1 T honey

add:

3 c white whole wheat flour
1 1/4 t salt

stir with a spoon or spatula to form a shaggy dough.  Then knead 8-12 times and form into a ball.  

Seal bowl and rest for 12-24 hours.

optional:   At this point, for a less tangy bread, knead in:

1/2 tsp baking soda

Form into a ball,, seal bowl, and let rise a few (up to 12, depending) hours until doubled in size.

Preheat covered casserole and oven to 425*F

Here it is again with pictures and step by step explanations

Inspired by Michael Pollen's book Cooked and several Science Friday guests, I started experimenting with whole wheat sourdough bread about a year ago.  I've played around with the recipe, and now that I have something that I like, and that gives me consistent results, I'm sharing it here.

First you need a starter, which you can make or purchase.  I don't honestly remember whose instructions I followed to make mine, but I'd suggest trying these from King Arthur Flour.

Once the starter exists, store it in the fridge.  you can store as little as a tablespoon.  Feed it 1/2 c flour and 1/3 cup filtered water twice a day.  Filtered or distilled water is crucial, because tap water is treated with chlorine to prevent microbes from growing in it.  This is great for our well-being, but terrible for sourdough, as it may kill the microbes you're working so hard to feed!

Get the starter out of the fridge at least 2 feedings before you plan to mix your dough.  Pour off the layer of alcohol on top (this is normal) and then feed with:

1/2 c all purpose flour
1/3 c filtered water

Keep the starter at room temperature, and feed every 12 hours.

To make the bread:

Mix together in a medium sized bowl:

1/2 c starter
1 1/4 c filtered water

add:

3 c white whole wheat flour
1 1/4 t salt

stir with a spoon or spatula to form a shaggy dough.  

This is what a shaggy dough looks like:


(I had to look that up the first time I read it in a bread recipe.)

Knead 8-12 times either on the counter or in the bowl.  Form the dough into a smooth ball.


*If you want to freeze your dough for later use this is the time.  Put it in a Ziploc, label it and freeze.  When you want to use the frozen dough get it out of the freezer and thaw on the counter.  Once it has warmed to room temperature, place it in a bowl to rise and continue to follow the recipe from this point.  When I get the starter out, I make as many balls of dough as I can and fill up the freezer.*

Close the bowl with a lid (Tupperware is great for this!) and allow to rest for 6 to 24 hours.  How long depends on your climate, your sourdough starter (it is different in different locations) and the time of year.  The yeast and other microbes in your sourdough need time to do their work.  Your dough is ready for the next step when it has grown and doubled in size:


At this point, for a less tangy bread, knead in:

1/2 tsp baking soda

Form into a ball, 


close the bowl with its lid, and let rest a few hours until doubled in size.


Place a covered casserole (the cool kids use a cast iron dutch oven, which does make a superior loaf) in the oven and preheat both casserole and oven to 425*F.

Once the oven is up to temperature, bake in the covered casserole or dutch oven for 35 minutes.

 before baking

after baking

Remove from the dish and cool on a wire rack.

You can test if your bread is done by holding it in one oven-mitted hand, and "thumping" it with the other.  A loaf that is fully baked will give a full satisfying thump. 

Sourdough is interesting stuff.  The wild yeast and other microbes in the starter are a combination of yeasts and microbes that were already living in your flour, and the yeasts and microbes in your kitchen.  This is why sourdoughs from different places will have a different flavor.  I brought my starter with me to my summer job, only a 4 hour drive away, and it was different there than at home.  I didn't taste a big difference, but it was much more active--generally lighter and frothier at my summer residence than it is at home.

Keeping this in mind, I encourage you to use this recipe as a launching off place.  Your kitchen is different than mine, and your sourdough will be different too.  Feel free to experiment with the amount of moisture in your recipe, resting times, cooking time, and anything else you care to play with.  A good scientist changes only one variable at a time, and records his/her methods and results each time!

Once you know how long your dough needs to rest at each step in your kitchen and climate, you should be able to bake bread any day, even in the middle of your work week, if most of your intervals work out to 12 or 24 hours.  I love that this recipe doesn't require a lot of time at any given step since there is almost no kneading, so while you make it over the course of 3 days (including starter feedings), it takes less than an hour of actual effort.

Here's the short and sweet version of the recipe, easy to copy and print and without the pictures:


Bake in covered casserole at 425*F for 35 minutes.

Remove loaf from casserole and cool on wire rack.

Friday, September 13, 2013

How to Knit Argyle Socks in the Round


*Want the pattern for the socks pictured here?  Click here to purchase* 

Traditionally, the leg of an argyle sock is knit flat.  Once the leg has been knit it is seamed up the back, and the rest of the sock is knit in the round. 

This is fine for the un-ambitious.

Personally, I prefer to knit anything I can in one piece.  I think that’s knitting’s biggest sculptural advantage—one can knit a fully shaped, one piece garment without any cutting or sewing.  Add to that the fact that store-bought argyle socks are seamless, and perhaps you can see why, when I learned that argyles “need” to be seamed, I took that as a challenge.

I’ve played with a few different ways to knit argyle in the round over the years.  I came up with each on my own, although I’m sure that lots of other knitters have come to the same solutions on their own over the years.  I’ve settled on what I think is the most successful method.  That’s what I’m sharing here.
These instructions are written with the assumption that you are familiar with and have knit a basic sock.
First, take a look at an argyle sock.  There are usually diamonds in 2 different colors, with a third color making the x’s that run through the diamonds.  This pair has blue diamonds which will be on the sides of the sock and green diamonds, while will be the front and back of the sock.  The diamonds interlock, so that the blue diamond makes up the negative space around the green, and vice versa.

To figure out where you are at each step of these instructions, on each row you work, you’ll need to keep in mind which color of diamonds is growing, and which is shrinking.  We’ll start where the green diamonds are growing, and the blue are shrinking.  By the way, I HIGHLY recommend winding your diamond colors onto bobbins, whether you knit your argyles in the round, or traditionally flat.  Either way bobbins greatly lessen the amount of tangling, and therefore frustration, with any kind of intarsia knitting.

 Argyle 1

But that’s jumping ahead just a bit.  To start the sock, cast on the number of stitches you like to cast on for a sock.  A multiple of 4 is ideal.  The example sock is knit on 60sts at a gauge of 8sts per inch.  Work 2x2 ribbing for about an inch in your main (background) color.

Set up row:  you’re beginning in the middle of the green diamonds, which is at the point of the blue diamonds.  Add in 2 different green bobbins, and 2 white bobbins for the x’s.  Also add a second ball, or bobbin of blue.  Divide your total number of stitches by 4 to get x.  Knit 1 blue stitch, then continue knitting in green until you’ve counted to x.  Start counting again, but this time the first stitch is a white cross stitch, then the rest of the green bobbin until you’ve counted to x again.  For the second half of the sock, you’ll do the same thing, but this time you’ll start back at the beginning of the row and purl across the inside.  Using the second balls of each color, p x-1 green, p1 white, p x-1 green, p1 blue, and you will have met your other half of the cast on, half way around the sock.   On our 60st example sock this means:  k1 blue, k14 green, k1 white, k14 green.  Start 2ndball of blue, p1 blue, start 2nd bobbin of green, p14 green, start second bobbin of white, p1 white, p14 green.  End of row.  Arrange your stitches across 4 needles, one for each diamond.  So at the moment, each blue stitch is on its own needle.  You’ll use a fifth needle as the working needle.

 Argyle 2

The arrows show the direction each green diamond was worked.  One was knit, the other purled.
At this point, both green strands of yarn are at the same end of the sock.  At that end, shift the last green stitch on each needle onto the needle with the one blue stitch.

 Argyle 3

Knit those 3 sts in blue, being sure to wrap the blue yarn with the green before and after you knit 3.  i.e. wrap, knit 3, wrap. 

 Argyle 4

*VERY IMPORTANT* You will always have the yarn ends of the “shrinking” diamonds right next to whichever “growing” diamond you are working on.  This is so that you can wrap the ends around each other in proper intarsia fashion at each edge of the growing diamond to prevent holes.  If this is not a familiar process, please look up intarsia knitting in you knitting books or online.  You need to wrap your ends whether you work your argyle socks in the round or flat.  This is what those wraps will eventually look like on the inside of your sock.

 Argyle 12

Now work across each green diamond to the other side of the sock.  You’ll knit across one diamond, and purl across the other, so as to keep the outside of the sock in stocking stitch.  In both cases, stop one stitch shy of the end of the needle.  You’ll also add the last 2 bobbins of white (4 total) on this row.  Remember that the white stitches each move by one stitch on every row.  If this makes you crazy and is just one too many things to keep track of, feel free to leave them out and add them with duplicate stitch after your sock is finished.

 Argyle 5

Slip each of those un-worked green stitches onto the needle with the blue stitch.

 Argyle 6

Purl these three stitches in blue.  Remember to wrap your ends.

 Argyle 7

Slip one more green from each green needle onto the blue needle you are working on.

Argyle 8

Turn and knit these 5 sts.  Remember to wrap your ends. 
You have worked 2 rows on the growing blue diamond, as indicated by the arrow.

 Argyle 9

Now you’ve established your pattern.  Here’s the whole thing in sequence.

1.       Work both shrinking green diamonds back to the other side of the sock.  Purl one, Knit the other, keeping the outside of the sock in stocking stitch.  Do not work the last stitch on each green diamond needle, instead, slip them to the needle holding the growing blue diamond.

Argyle 10

2.   Purl the stitches on the blue needle, slip another green from each needle, turn, and work across again.  Remember to wrap your ends.  I’m going to stop writing that now, but you should keep doing it at every boundary between colors.  You’ve now gone back and forth on the blue needle.

 Argyle 11

That’s it.  You’re now ready to work back across the shrinking green diamonds, and do the same thing on the other side. 

In general, you always work across both shrinking diamonds to bring them to one side of the sock, leave the end stitches, then work back and forth on the growing diamond, knitting the left behind stitches on the first pass, and the slipping two new stitches to the growing diamond’s needle to work on the second pass.
Keep doing this until the growing diamonds have grown across the whole sock.  There will be one row with only blue and white stitches, no green.  At this point everything shifts.  The green diamonds start growing from one stitch, and the blue diamonds become the shrinking diamonds.  Start over again with the instructions just after the set up row, but this time with the colors reversed.  Once the blue diamonds shrink down to just one stitch, you’re back to the beginning.  Continue like this until you’re ready to do the heal, at which point your sock can easily become a simple sock, knit out of just your back ground color all the way to the toe.  You could also do a contrast heal and toe.  It’s your sock—do what pleases you.

If, once you’ve tried this, the whole thing makes you want to throw your project across the room, don’t torture yourself.  Go back to knitting your argyles in the tried and true flat method.

*Want the pattern for the socks pictured here?  Click here to purchase*