Tuesday, July 15, 2008
Postcards From Cooperstown
It's been a busy summer, more hectic than some, but there's still time to do a bit of site seeing around the Cooperstown area. Of course I adore the Farmer's Museum, where the chickens walk around the grounds with you.
Various flowers are blooming around the house. I think these are the flowering sweet peas that Lisa planted.
This was my tenth year at the Springfield 4th of July parade. This tractor is just slightly earlier than my favorite style of John Deere. I think this one is late 30's early 40's, and my favorite is mid to late 40's.
I didn't get a picture of the Opera's float, but there are several at the Opera blog entry for Independence Day. I did check the corn, which was indeed knee high by the fourth of July.
Our attempt at going to the Sterling Renaissance Festival (which I was last at 19 years ago) was horribly rained out, so the only photo I got was of Brittney filling her tank in full Elizabethan underwear.
Wednesday, July 02, 2008
Faith in the Trenches
In the past few years, I’ve gotten much more involved in gardening. I didn’t build or plant the garden beds here at the farmhouse. They have been passed down through various opera employees who have been housed here over the years, but I suspect started with an earlier more permanent resident. The garden improved greatly over the past 3 or 4 years after I started hoeing in the compost each May left from the previous summer’s compost pile. The first year the herb bed got compost, it went from only growing ten inch high basil to growing 2 foot high basil bushes. Let it never be said that compost doesn’t work!
As I get more involved in (and attached to) this garden, I get more ambitious about what I plant. I also get more optimistic about how long I think I’ll keep coming back to the Opera to reap the harvest of my previous year’s work. And of course, if I am going to expand the area and content of the garden, doing so with perennials means that I won’t have to keep planting all that space every year.
This year’s perennial expansion includes mint transplanted from Dad’s garden so I can have minty iced tea, rhubarb, and asparagus. All the mint that used to grow at the farmhouse has died out, so I got some of Dad’s unstoppable mint. We don’t even really know what kind it is (although it looks the most like pictures of spearmint) because it was already growing at my parents’ house when they moved in the year before I was born. I planted it after Memorial Day, and there’s already twice as much as I planted. The rhubarb is a hopeful investment for next year’s pies, but the asparagus is a real study in faith.
I tend to feel like most gardening is a study in faith. It’s not surprising at all that Jesus used planting and harvest in so many of his parables. It takes only a little faith to believe that when I plant a small plant, like tomato plants or herbs, it will grow to be a larger version of itself. It takes a tiny bit more faith to believe it will eventually bear fruit. For me, the really powerful experience is planting seeds, and then spending weeks carefully tending a patch of dirt. I’ve seen my lettuce seeds grow into a pretty impressive bed of salad for years now, but it still seems miraculous every time. It’s only faith in experience, in the words on the back of the seed packet, and in the previous experience of so many other gardeners, that keeps me coming back each morning to lovingly water a patch of dirt as if it was a bed of lettuce. And every spring, after a week or two of faithful, but emotionally illogical dirt watering, lettuce grows! I water even while I doubt. I question whether I planted it right this year, whether the seeds I bought are viable, whether I’ve planted at the right depth, provided the right amount of water, whether I’ve waited long enough to avoid frost. Even though I doubt, I continue to tend out of faith, and my faith is rewarded.
This spring, when I planted the asparagus, I set myself up for a much bigger test of my gardening faith. First off, I’m trusting that I will still be working at Glimmerglass in the summer of 2010 when I’ll get my first full harvest. Second, I’m trusting that planting dead stuff that looks like an octopus made out of dry sticks and raffia is going to actually result in asparagus, and wasn’t just a hoax perpetrated by the garden supply store. The best part is that both Rachel and Brittney joined in on my act of faith and helped dig THE TRENCH.

I am very proud of THE TRENCH. Every summer, I garden with only a few rudimentary tools, like a crappy old shovel and a nicer pitchfork. There are no rototillers or garden weasels. There isn’t even a wheel barrow to move the compost. The three of us used a hoe, a crappy shovel, and a pitchfork to dig THE TRENCH 10 feet long, 18 inches wide, and 12 inches deep, plus we had to loosen and de-rock an additional 6 inches of soil below that. Then, as it was getting dark, we went over to our neighbors, the dairy farmers, and politely asked for 3 buckets of old cow manure. We got to ride in a Dodge Dakota up to the hill where such stuff was piled and, with our shovels and rakes and implements of destruction, dig up our bucket fulls and ride back down to THE TRENCH. My intrepid helpers learned the hard way that when riding in the bed of an open truck with buckets of manure, one should ride forward of the buckets of manure to keep one’s eyes clear of debris.

Then began the layers. Commercial 10-10-10 fertilizer was spread in the bottom of THE TRENCH, then the manure, then 2" of dirt, then the dry spidery roots–10 of them at 1 foot intervals. Then another 6 inches of dirt. Then began the waiting. As the waiting got really long, my faith began to stretch and crack. After all, this was an involved process with lots of steps that could be screwed up. I could have buried the roots too deep, they might have sat dormant in the store for too long, they might be too close to the manure and get “burned.” I started looking for information on how long it should take for them to come up. Dad didn’t really remember, as his asparagus bed is at least 15 years old. “Sprocket’s Victory Garden” didn’t say. Most websites don’t say. I finally found one that said, “after several weeks,” and another that said “as the summer progresses.” I got antsy. That’s a whole lot of work, much of it offered freely by friends, that I’d hate to see result in nothing. I started getting worried that I wouldn’t see any asparagus before leaving at the end of July. I’m supposed to wait until it comes up before filling in THE TRENCH the rest of the way. I’d really like to fill it in the rest of the way, because I’m tired of having to weed the pile of dirt that’s waiting to go back into the THE TRENCH from whence it came.
Then yesterday morning, there it was.

One teeny tiny asparagus shoot. Asparagus in miniature. My shaky faith has been shored up. My doubt has been dispelled. If nothing else, asparagus #1, on the far left end, has come up. Now I’m waiting for the others, so I can finish the job.
As I get more involved in (and attached to) this garden, I get more ambitious about what I plant. I also get more optimistic about how long I think I’ll keep coming back to the Opera to reap the harvest of my previous year’s work. And of course, if I am going to expand the area and content of the garden, doing so with perennials means that I won’t have to keep planting all that space every year.
This year’s perennial expansion includes mint transplanted from Dad’s garden so I can have minty iced tea, rhubarb, and asparagus. All the mint that used to grow at the farmhouse has died out, so I got some of Dad’s unstoppable mint. We don’t even really know what kind it is (although it looks the most like pictures of spearmint) because it was already growing at my parents’ house when they moved in the year before I was born. I planted it after Memorial Day, and there’s already twice as much as I planted. The rhubarb is a hopeful investment for next year’s pies, but the asparagus is a real study in faith.
I tend to feel like most gardening is a study in faith. It’s not surprising at all that Jesus used planting and harvest in so many of his parables. It takes only a little faith to believe that when I plant a small plant, like tomato plants or herbs, it will grow to be a larger version of itself. It takes a tiny bit more faith to believe it will eventually bear fruit. For me, the really powerful experience is planting seeds, and then spending weeks carefully tending a patch of dirt. I’ve seen my lettuce seeds grow into a pretty impressive bed of salad for years now, but it still seems miraculous every time. It’s only faith in experience, in the words on the back of the seed packet, and in the previous experience of so many other gardeners, that keeps me coming back each morning to lovingly water a patch of dirt as if it was a bed of lettuce. And every spring, after a week or two of faithful, but emotionally illogical dirt watering, lettuce grows! I water even while I doubt. I question whether I planted it right this year, whether the seeds I bought are viable, whether I’ve planted at the right depth, provided the right amount of water, whether I’ve waited long enough to avoid frost. Even though I doubt, I continue to tend out of faith, and my faith is rewarded.
This spring, when I planted the asparagus, I set myself up for a much bigger test of my gardening faith. First off, I’m trusting that I will still be working at Glimmerglass in the summer of 2010 when I’ll get my first full harvest. Second, I’m trusting that planting dead stuff that looks like an octopus made out of dry sticks and raffia is going to actually result in asparagus, and wasn’t just a hoax perpetrated by the garden supply store. The best part is that both Rachel and Brittney joined in on my act of faith and helped dig THE TRENCH.
I am very proud of THE TRENCH. Every summer, I garden with only a few rudimentary tools, like a crappy old shovel and a nicer pitchfork. There are no rototillers or garden weasels. There isn’t even a wheel barrow to move the compost. The three of us used a hoe, a crappy shovel, and a pitchfork to dig THE TRENCH 10 feet long, 18 inches wide, and 12 inches deep, plus we had to loosen and de-rock an additional 6 inches of soil below that. Then, as it was getting dark, we went over to our neighbors, the dairy farmers, and politely asked for 3 buckets of old cow manure. We got to ride in a Dodge Dakota up to the hill where such stuff was piled and, with our shovels and rakes and implements of destruction, dig up our bucket fulls and ride back down to THE TRENCH. My intrepid helpers learned the hard way that when riding in the bed of an open truck with buckets of manure, one should ride forward of the buckets of manure to keep one’s eyes clear of debris.
Then began the layers. Commercial 10-10-10 fertilizer was spread in the bottom of THE TRENCH, then the manure, then 2" of dirt, then the dry spidery roots–10 of them at 1 foot intervals. Then another 6 inches of dirt. Then began the waiting. As the waiting got really long, my faith began to stretch and crack. After all, this was an involved process with lots of steps that could be screwed up. I could have buried the roots too deep, they might have sat dormant in the store for too long, they might be too close to the manure and get “burned.” I started looking for information on how long it should take for them to come up. Dad didn’t really remember, as his asparagus bed is at least 15 years old. “Sprocket’s Victory Garden” didn’t say. Most websites don’t say. I finally found one that said, “after several weeks,” and another that said “as the summer progresses.” I got antsy. That’s a whole lot of work, much of it offered freely by friends, that I’d hate to see result in nothing. I started getting worried that I wouldn’t see any asparagus before leaving at the end of July. I’m supposed to wait until it comes up before filling in THE TRENCH the rest of the way. I’d really like to fill it in the rest of the way, because I’m tired of having to weed the pile of dirt that’s waiting to go back into the THE TRENCH from whence it came.
Then yesterday morning, there it was.
One teeny tiny asparagus shoot. Asparagus in miniature. My shaky faith has been shored up. My doubt has been dispelled. If nothing else, asparagus #1, on the far left end, has come up. Now I’m waiting for the others, so I can finish the job.
Tuesday, May 20, 2008
How Not To Thrum Mittens
I like to analyze how things are made, and to know why they were originally made that way. I spend a lot of time at work poring over old tailor’s drafts and all the other information I can find about how garments were made in past centuries, and I love figuring out why they are made like that, and getting into the long dead tailor’s or seamstress’ mind. And then I figure out how I may need to adjust them for modern materials, and modern bodies, and how I may want to improve them, at least in small ways. When it comes to knitting, I almost always feels that there are ways that I can improve the pattern as written. I feel that I know more about fit than most pattern writers, and I fully believe that it’s better to knit something as seemlessly as possible than to knit it in a bunch of separate pieces as most patterns instruct. This infuriating belief that I always know better can sometimes backfire on me.
I decided to make thrummed mittens after reading about them in a Spin Off article a few years ago. I erroneously thought that they had been invented by the writer of the article. When I saw that each thrum was a separate piece, I decided that that was a mistake on which I could improve. So instead I decided to use a continuous piece of roving, with the idea that it would be more secure than individual bits. Boy was I wrong. Because the roving was caught at all different points within each fiber, much of it disappeared with use, and came out of the mittens as annoying extraneous fluff.
As you can see here, after a few years of wear, the roving worked in as another “yarn” is too thin to really add to the overall warmth of the mittens. I really like these mittens, are at least the idea of these mittens, because they include wool from Oscar, Lilly, Iris, and Blaze, all of whom were sheep I had met and who are no longer with us, and also angora from my first pet rabbit Jessica, who has been gone for over 5 years now. Also, they match my hat and scarf. So after researching more about thrumming, and realizing that sometimes things are done that way for a reason and don’t need my help, I decided to unravel and reknit them the right way.
I started by unraveling the yarn, winding it back into a skein, and washing it. This took out all the kinks, fluffed it up again, and got it really clean. Think about it, the soap may not really get in between all the stitches when you wash a knitted garment, but boy it can get all the way around strands of yarn in a loose skein.
I threw out the remains of the brown roving, and started fresh. I ended up using at least twice what is pictured of the dark brown for the thrums.
As for actually thrumming the right way, both the Yarn Harlot and Adria at hello yarn have excellent and well photographed instructions posted for free at their blogs. (Click on their names to see!) I did a combination of the two, maybe leaning slightly more towards the Harlot’s method.
The actual thrummed mittens. Look how much fuller and fluffier they are than the first attempt. It’s best to wait until spring to unravel one’s winter mittens, so I can’t test them while shoveling snow in Buffalo until at least late October, but I can tell just by putting them on that they’re way warmer.

I decided to make thrummed mittens after reading about them in a Spin Off article a few years ago. I erroneously thought that they had been invented by the writer of the article. When I saw that each thrum was a separate piece, I decided that that was a mistake on which I could improve. So instead I decided to use a continuous piece of roving, with the idea that it would be more secure than individual bits. Boy was I wrong. Because the roving was caught at all different points within each fiber, much of it disappeared with use, and came out of the mittens as annoying extraneous fluff.
As you can see here, after a few years of wear, the roving worked in as another “yarn” is too thin to really add to the overall warmth of the mittens. I really like these mittens, are at least the idea of these mittens, because they include wool from Oscar, Lilly, Iris, and Blaze, all of whom were sheep I had met and who are no longer with us, and also angora from my first pet rabbit Jessica, who has been gone for over 5 years now. Also, they match my hat and scarf. So after researching more about thrumming, and realizing that sometimes things are done that way for a reason and don’t need my help, I decided to unravel and reknit them the right way. As for actually thrumming the right way, both the Yarn Harlot and Adria at hello yarn have excellent and well photographed instructions posted for free at their blogs. (Click on their names to see!) I did a combination of the two, maybe leaning slightly more towards the Harlot’s method.
Friday, March 28, 2008
Buffalo Guys' Diamond Socks–The Well Explained Wordy Pattern
This pattern is long, but carefully explained for knitters who have not knit many socks yet. If you are an experienced sock knitter, you may want to use the short form.
Sized to fit ankles 9 ½-10, (10 ½-11) inches in circumference
Lengths given for men’s shoe sizes 6-14
Gauge: 9 sts per inch
Needles: 1 set of double points in correct size to obtain gauge. (I used zeros, I knit loose. Do a swatch, it’ll make things go better for you later, honest.)
Instructions:
Cast on 72 (80) sts. (If you know how, cast on in ribbing for 2x2 rib. If you don’t know how, don’t worry, any stretchy cast on you already know will be fine.) Divide onto 3 needles, place a marker for the beginning of the round, and join, being careful not to twist.
R 1: k2, p2, repeat around.
R 2-20: continue in 2x2 rib (i.e. repeat round 1)
R 21: reset stitch counter or brain to round 1, this is the beginning of the diamond pattern.
Diamond pattern for leg:
R 1: p1, k3, p1, k3, repeat around
R 2: p1, k3, p1, k3, repeat around
R 3: k3,*[ p1, k1, p1, k5] repeat from star around, ending p1, k1, p1, k2
R 4: k3,*[ p1, k1, p1, k5] repeat from star around, ending p1, k1, p1, k2
R 5: k2, *[p1, k3, p1, k3] repeat from star around, ending p1, k3, p1, k1
R 6: k2, *[p1, k3, p1, k3] repeat from star around, ending p1, k3, p1, k1
R 7: k1, *[p1, k5, p1, k1] repeat from star around, ending p1, k5, p1
R 8: k1, *[p1, k5, p1, k1] repeat from star around, ending p1, k5, p1
R 9: p1, k3, p1, k3, repeat around
R 10: p1, k3, p1, k3, repeat around
R 11: k1, *[p1, k5, p1, k1] repeat from star around, ending p1, k5, p1
R 12: k1, *[p1, k5, p1, k1] repeat from star around, ending p1, k5, p1
R 13: k2, *[p1, k3, p1, k3] repeat from star around, ending p1, k3, p1, k1
R 14: k2, *[p1, k3, p1, k3] repeat from star around, ending p1, k3, p1, k1
R 15: k3,*[ p1, k1, p1, k5] repeat from star around, ending p1, k1, p1, k2
R 16: k3,*[ p1, k1, p1, k5] repeat from star around, ending p1, k1, p1, k2
Continue knitting in this pattern until 4 ½ diamonds have been knit down the back of the sock leg (i.e. directly in line with your beginning of round stitch marker). End with round 10. Then begin the heel flap.
Heel flap:
R 1: Knit 18 (20) sts, then turn
R 2: sl 1, Purl 35 (39) sts, turn.
At this point, arrange the stitches you’ve just worked on one dpn, and the remaining stitches on another dpn. Leave these unworked stitches alone while you knit the heel. They will become the instep stitches. In fact, if you can, cap the ends of that needle, or fit a holder over it, so you don’t lose the instep stitches when pulling your work out of your knitting bag. I speak from experience. Continuing on the heel sts:
R 3: [sl 1, k1] across heel sts
R 4: sl 1, p across heel sts
repeat rows 3 and 4 until you have 17 (19) slipped stitches along each edge of the heel flap.
Reset stitch counter or brain to row 1. Begin turning the heel.
Turning the Heel:
R 1: sl 1, k 19(21) sts, ssk, k1, turn.
(If you have never knit a sock before, you may be questioning this step, as there are still unknit stitches on the needle, this is correct, and although it is hard, go ahead and turn, and follow the heel turning directions line by line, and all should be well. If not, there are some very nice illustrated books on sock knitting that can help you with diagrams and explanation. I highly recommend Nancy Bush’s Folk Socks.)
R 2: sl 1, p 5, p2 tog, p1, turn
R 3: sl 1, k 6, ssk, k1, turn
R 4: sl 1, p 7, p2 tog, p1, turn
R 5: sl 1, k 8, ssk, k1, turn
(At this point you may have noticed that when you either p2 tog or ssk, you are doing so “across the gap.” You are welcome to continue each row by working to the gap, ssk or p2 tog, and then k1 or p1. If that doesn’t work for you, continue following the directions line by line. Either way you’ll end up in the same place.)
R 6: sl 1, p 9, p2 tog, p1, turn
R 7: sl 1, k 10, ssk, k1, turn
R 8: sl 1, p 11, p2 tog, p1, turn
R 9: sl 1, k 12, ssk, k1, turn
R 10: sl 1, p 13, p2 tog, p1, turn
R 11: sl 1, k 14, ssk, k1, turn
R 12: sl 1, p 15, p2 tog, p1, turn
R 13: sl 1, k 16, ssk, k1, turn
R 14: sl 1, p 17, p2 tog, p1, turn
smaller size only:
R 15: sl 1, k 18, ssk, turn
R 16: sl 1, p 18, p2 tog, turn
R 17: sl 1, k19 DO NOT TURN
larger size only:
R 15: sl 1, k 18, ssk, k1, turn
R 16: sl 1, p 19, p2 tog, p1, turn
R 17: sl 1, k 20, ssk, k1, turn
R 18: sl 1, p 21, p2 tog, p1, turn
R 19: sl 1, k 23 DO NOT TURN
Pick Up For the Gusset:
Divide your heel sts between 2 needles. The beginning of your round is now between these 2 needles. Think of these as needles 4 and 1. Along the edge of the heel flap using needle 1, pick up and knit the back loop of the 18 (20) edge stitches. Now reach down to the row below the last stitch picked up, and pick up that stitch too. This prevents the small hole that would have otherwise formed at the corner of your heel flap. Using a free needle, which will become needle 2, knit across the 18 (20) instep sts, continuing in the diamond pattern (round 11). Using a free needle, which will become needle 3, pick up and knit 19 (20) sts along the other side of the heel flap, beginning with the “extra” stitch from 1 row below. After picking up the stitches, still using needle 3, knit across the 10 (12) sts on needle 4. You now have all your sts arranged on 3 needles, leaving the 4th as your working needle.
That was just one round. Whew!
Gusset decreases:
Again, reset stitch counter or mind to round 1
R 1: k across needle 1, continue diamond pattern across needle 2, knit across needle 3
R 2: Needle 1: k to last 3 sts, k2 tog, k1.
Needle 2: Continue diamond pattern
Needle 3: k1, ssk, k to end of needle.
Continue alternating between rounds 1 and 2 until you have decreased back to the original 72 (80) sts. Continue down the foot, knitting all the sts on needles 1 and 3, and continuing the diamond pattern on needle #2.
When the foot is 2" shorter than its finished length begin the toe decreases. If you aren’t making these for yourself, or haven’t been able to measure the recipient’s foot, here’s a pretty good idea of men's foot lengths based on shoe size:
Toe decrease:
Reset stitch counter, or brain, to round 1.
R 1: Needle 1: k to last 3 sts, k2 tog, k1.
Needle 2: k1, ssk, k to last 3 sts, k2 tog, k1.
Needle 3: k1, ssk, k to end of needle.
R 2: k (Yes, you’re done with the diamonds now.)
Repeat rounds 1 and 2 until there are 36 (40) sts total.
Repeat round 1 until there are 16 sts total.
Knit across needle 1 and break yarn, leaving a 12" tail.
Use kitchener stitch to graft the remaining sts together.
Work in ends, and block.
Sized to fit ankles 9 ½-10, (10 ½-11) inches in circumference
Lengths given for men’s shoe sizes 6-14
Gauge: 9 sts per inch
Needles: 1 set of double points in correct size to obtain gauge. (I used zeros, I knit loose. Do a swatch, it’ll make things go better for you later, honest.)
Instructions:
Cast on 72 (80) sts. (If you know how, cast on in ribbing for 2x2 rib. If you don’t know how, don’t worry, any stretchy cast on you already know will be fine.) Divide onto 3 needles, place a marker for the beginning of the round, and join, being careful not to twist.
R 1: k2, p2, repeat around.
R 2-20: continue in 2x2 rib (i.e. repeat round 1)
R 21: reset stitch counter or brain to round 1, this is the beginning of the diamond pattern.
Diamond pattern for leg:
R 1: p1, k3, p1, k3, repeat around
R 2: p1, k3, p1, k3, repeat around
R 3: k3,*[ p1, k1, p1, k5] repeat from star around, ending p1, k1, p1, k2
R 4: k3,*[ p1, k1, p1, k5] repeat from star around, ending p1, k1, p1, k2
R 5: k2, *[p1, k3, p1, k3] repeat from star around, ending p1, k3, p1, k1
R 6: k2, *[p1, k3, p1, k3] repeat from star around, ending p1, k3, p1, k1
R 7: k1, *[p1, k5, p1, k1] repeat from star around, ending p1, k5, p1
R 8: k1, *[p1, k5, p1, k1] repeat from star around, ending p1, k5, p1
R 9: p1, k3, p1, k3, repeat around
R 10: p1, k3, p1, k3, repeat around
R 11: k1, *[p1, k5, p1, k1] repeat from star around, ending p1, k5, p1
R 12: k1, *[p1, k5, p1, k1] repeat from star around, ending p1, k5, p1
R 13: k2, *[p1, k3, p1, k3] repeat from star around, ending p1, k3, p1, k1
R 14: k2, *[p1, k3, p1, k3] repeat from star around, ending p1, k3, p1, k1
R 15: k3,*[ p1, k1, p1, k5] repeat from star around, ending p1, k1, p1, k2
R 16: k3,*[ p1, k1, p1, k5] repeat from star around, ending p1, k1, p1, k2
Continue knitting in this pattern until 4 ½ diamonds have been knit down the back of the sock leg (i.e. directly in line with your beginning of round stitch marker). End with round 10. Then begin the heel flap.
Heel flap:
R 1: Knit 18 (20) sts, then turn
R 2: sl 1, Purl 35 (39) sts, turn.
At this point, arrange the stitches you’ve just worked on one dpn, and the remaining stitches on another dpn. Leave these unworked stitches alone while you knit the heel. They will become the instep stitches. In fact, if you can, cap the ends of that needle, or fit a holder over it, so you don’t lose the instep stitches when pulling your work out of your knitting bag. I speak from experience. Continuing on the heel sts:
R 3: [sl 1, k1] across heel sts
R 4: sl 1, p across heel sts
repeat rows 3 and 4 until you have 17 (19) slipped stitches along each edge of the heel flap.
Reset stitch counter or brain to row 1. Begin turning the heel.
Turning the Heel:
R 1: sl 1, k 19(21) sts, ssk, k1, turn.
(If you have never knit a sock before, you may be questioning this step, as there are still unknit stitches on the needle, this is correct, and although it is hard, go ahead and turn, and follow the heel turning directions line by line, and all should be well. If not, there are some very nice illustrated books on sock knitting that can help you with diagrams and explanation. I highly recommend Nancy Bush’s Folk Socks.)
R 2: sl 1, p 5, p2 tog, p1, turn
R 3: sl 1, k 6, ssk, k1, turn
R 4: sl 1, p 7, p2 tog, p1, turn
R 5: sl 1, k 8, ssk, k1, turn
(At this point you may have noticed that when you either p2 tog or ssk, you are doing so “across the gap.” You are welcome to continue each row by working to the gap, ssk or p2 tog, and then k1 or p1. If that doesn’t work for you, continue following the directions line by line. Either way you’ll end up in the same place.)
R 6: sl 1, p 9, p2 tog, p1, turn
R 7: sl 1, k 10, ssk, k1, turn
R 8: sl 1, p 11, p2 tog, p1, turn
R 9: sl 1, k 12, ssk, k1, turn
R 10: sl 1, p 13, p2 tog, p1, turn
R 11: sl 1, k 14, ssk, k1, turn
R 12: sl 1, p 15, p2 tog, p1, turn
R 13: sl 1, k 16, ssk, k1, turn
R 14: sl 1, p 17, p2 tog, p1, turn
smaller size only:
R 15: sl 1, k 18, ssk, turn
R 16: sl 1, p 18, p2 tog, turn
R 17: sl 1, k19 DO NOT TURN
larger size only:
R 15: sl 1, k 18, ssk, k1, turn
R 16: sl 1, p 19, p2 tog, p1, turn
R 17: sl 1, k 20, ssk, k1, turn
R 18: sl 1, p 21, p2 tog, p1, turn
R 19: sl 1, k 23 DO NOT TURN
Pick Up For the Gusset:
Divide your heel sts between 2 needles. The beginning of your round is now between these 2 needles. Think of these as needles 4 and 1. Along the edge of the heel flap using needle 1, pick up and knit the back loop of the 18 (20) edge stitches. Now reach down to the row below the last stitch picked up, and pick up that stitch too. This prevents the small hole that would have otherwise formed at the corner of your heel flap. Using a free needle, which will become needle 2, knit across the 18 (20) instep sts, continuing in the diamond pattern (round 11). Using a free needle, which will become needle 3, pick up and knit 19 (20) sts along the other side of the heel flap, beginning with the “extra” stitch from 1 row below. After picking up the stitches, still using needle 3, knit across the 10 (12) sts on needle 4. You now have all your sts arranged on 3 needles, leaving the 4th as your working needle.
That was just one round. Whew!
Gusset decreases:
Again, reset stitch counter or mind to round 1
R 1: k across needle 1, continue diamond pattern across needle 2, knit across needle 3
R 2: Needle 1: k to last 3 sts, k2 tog, k1.
Needle 2: Continue diamond pattern
Needle 3: k1, ssk, k to end of needle.
Continue alternating between rounds 1 and 2 until you have decreased back to the original 72 (80) sts. Continue down the foot, knitting all the sts on needles 1 and 3, and continuing the diamond pattern on needle #2.
When the foot is 2" shorter than its finished length begin the toe decreases. If you aren’t making these for yourself, or haven’t been able to measure the recipient’s foot, here’s a pretty good idea of men's foot lengths based on shoe size:
Toe decrease:
Reset stitch counter, or brain, to round 1.
R 1: Needle 1: k to last 3 sts, k2 tog, k1.
Needle 2: k1, ssk, k to last 3 sts, k2 tog, k1.
Needle 3: k1, ssk, k to end of needle.
R 2: k (Yes, you’re done with the diamonds now.)
Repeat rounds 1 and 2 until there are 36 (40) sts total.
Repeat round 1 until there are 16 sts total.
Knit across needle 1 and break yarn, leaving a 12" tail.
Use kitchener stitch to graft the remaining sts together.
Work in ends, and block.
Buffalo Guys' Diamond Socks–The Short Form
This pattern is brief, for the experienced sock knitter who just wants the stitch pattern and a few useful numbers. If you have not knit very many socks, you may want to use the Well Explained pattern.
Sized to fit ankles 9 ½-10, (10 ½-11) inches in circumference
Lengths given for men’s shoe sizes 6-14
Gauge: 9 sts per inch
Needles: 1 set of double points in correct size to obtain gauge. (I used zeros, I knit loose. Do a swatch, it’ll make things go better for you later, honest.)
Instructions:
Cast on 72 (80)sts. (If you know how, cast on in ribbing for 2x2 rib. If you don’t know how, don’t worry, any stretchy cast on you already know will be fine.)
Rib for 20 rounds.
Begin diamond pattern:
R 1: p1, k3, p1, k3, repeat around
R 2: p1, k3, p1, k3, repeat around
R 3: k3,*[ p1, k1, p1, k5] repeat from star around, ending p1, k1, p1, k2
R 4: k3,*[ p1, k1, p1, k5] repeat from star around, ending p1, k1, p1, k2
R 5: k2, *[p1, k3, p1, k3] repeat from star around, ending p1, k3, p1, k1
R 6: k2, *[p1, k3, p1, k3] repeat from star around, ending p1, k3, p1, k1
R 7: k1, *[p1, k5, p1, k1] repeat from star around, ending p1, k5, p1
R 8: k1, *[p1, k5, p1, k1] repeat from star around, ending p1, k5, p1
R 9: p1, k3, p1, k3, repeat around
R 10: p1, k3, p1, k3, repeat around
R 11: k1, *[p1, k5, p1, k1] repeat from star around, ending p1, k5, p1
R 12: k1, *[p1, k5, p1, k1] repeat from star around, ending p1, k5, p1
R 13: k2, *[p1, k3, p1, k3] repeat from star around, ending p1, k3, p1, k1
R 14: k2, *[p1, k3, p1, k3] repeat from star around, ending p1, k3, p1, k1
R 15: k3,*[ p1, k1, p1, k5] repeat from star around, ending p1, k1, p1, k2
R 16: k3,*[ p1, k1, p1, k5] repeat from star around, ending p1, k1, p1, k2
Continue knitting in this pattern until 4 ½ diamonds have been knit down the back of the sock leg (i.e. directly in line with your beginning of round stitch marker). End with round 10. Then begin the heel flap.
Heel flap:
worked over half the sts
R 1: Knit 18 (20) sts, then turn
R 2: sl 1, Purl 35 (39) sts, turn.
R 3: [sl 1, k1] across heel sts
R 4: sl 1, p across heel sts
repeat rows 3 and 4 until you have 17 (19) slipped stitches along each edge of the heel flap. Reset stitch counter or brain to row 1. Begin turning the heel.
Turning the heel:
R 1: sl 1, k 19(21) sts, ssk, k1, turn.
R 2: sl 1, p 5, p2 tog, p1, turn
continue working in this manner: sl the first st, work two together across the gap, work one more stitch, then turn
Continue until all heel sts have been knit.
Pick Up For the Gusset:
With needle #1 pick up and knit the 18 (20) slipped sts along the edge of the heel flap. Now reach down to the row below the last stitch picked up, and pick up that stitch too. This prevents the small hole that would have otherwise formed at the corner of your heel flap.
Continue working the diamond pattern (round 11) across the instep sts on needle #2. With needle #3, pick up and knit 19 (21) sts along the other side of the heel flap (including the “extra” to prevent a hole) and then continue across half of the heel sts. Slip the remaining heel sts to the beginning of needle #1.
Decrease Gusset :
Next round, k across needle 1, continue in the diamond pattern across needle 2, k across needle 3.
Decrease round:
Needle 1: k to last 3 sts, k2 tog, k1
needle 2: continue in the diamond pattern
needle 3: k1, ssk, k to end.
Alternate between the plain round and the decrease round until you are back to 72 (80) sts total, working the bottom of the foot in plain stockinette and continuing the diamond pattern over the top of the foot.
When the foot is 2" shorter than the desired length begin the toe decreases. If you aren’t making these for yourself, or haven’t been able to measure the recipient’s foot, here’s a pretty good idea of men's foot lengths based on shoe size:
Toe decrease:
Reset stitch counter, or brain, to round 1.
R 1: Needle 1: k to last 3 sts, k2 tog, k1.
Needle 2: k1, ssk, k to last 3 sts, k2 tog, k1.
Needle 3: k1, ssk, k to end of needle.
R 2: k (Yes, you’re done with the diamonds now.)
Repeat rounds 1 and 2 until there are 36 (40) sts total.
Repeat round 1 until there are 16 sts total.
Knit across needle 1 and break yarn, leaving a 12" tail.
Use kitchener stitch to graft the remaining sts together.
Work in ends, and block.


Sized to fit ankles 9 ½-10, (10 ½-11) inches in circumference
Lengths given for men’s shoe sizes 6-14
Gauge: 9 sts per inch
Needles: 1 set of double points in correct size to obtain gauge. (I used zeros, I knit loose. Do a swatch, it’ll make things go better for you later, honest.)
Instructions:
Cast on 72 (80)sts. (If you know how, cast on in ribbing for 2x2 rib. If you don’t know how, don’t worry, any stretchy cast on you already know will be fine.)
Rib for 20 rounds.
Begin diamond pattern:
R 1: p1, k3, p1, k3, repeat around
R 2: p1, k3, p1, k3, repeat around
R 3: k3,*[ p1, k1, p1, k5] repeat from star around, ending p1, k1, p1, k2
R 4: k3,*[ p1, k1, p1, k5] repeat from star around, ending p1, k1, p1, k2
R 5: k2, *[p1, k3, p1, k3] repeat from star around, ending p1, k3, p1, k1
R 6: k2, *[p1, k3, p1, k3] repeat from star around, ending p1, k3, p1, k1
R 7: k1, *[p1, k5, p1, k1] repeat from star around, ending p1, k5, p1
R 8: k1, *[p1, k5, p1, k1] repeat from star around, ending p1, k5, p1
R 9: p1, k3, p1, k3, repeat around
R 10: p1, k3, p1, k3, repeat around
R 11: k1, *[p1, k5, p1, k1] repeat from star around, ending p1, k5, p1
R 12: k1, *[p1, k5, p1, k1] repeat from star around, ending p1, k5, p1
R 13: k2, *[p1, k3, p1, k3] repeat from star around, ending p1, k3, p1, k1
R 14: k2, *[p1, k3, p1, k3] repeat from star around, ending p1, k3, p1, k1
R 15: k3,*[ p1, k1, p1, k5] repeat from star around, ending p1, k1, p1, k2
R 16: k3,*[ p1, k1, p1, k5] repeat from star around, ending p1, k1, p1, k2
Continue knitting in this pattern until 4 ½ diamonds have been knit down the back of the sock leg (i.e. directly in line with your beginning of round stitch marker). End with round 10. Then begin the heel flap.
Heel flap:
worked over half the sts
R 1: Knit 18 (20) sts, then turn
R 2: sl 1, Purl 35 (39) sts, turn.
R 3: [sl 1, k1] across heel sts
R 4: sl 1, p across heel sts
repeat rows 3 and 4 until you have 17 (19) slipped stitches along each edge of the heel flap. Reset stitch counter or brain to row 1. Begin turning the heel.
Turning the heel:
R 1: sl 1, k 19(21) sts, ssk, k1, turn.
R 2: sl 1, p 5, p2 tog, p1, turn
continue working in this manner: sl the first st, work two together across the gap, work one more stitch, then turn
Continue until all heel sts have been knit.
Pick Up For the Gusset:
With needle #1 pick up and knit the 18 (20) slipped sts along the edge of the heel flap. Now reach down to the row below the last stitch picked up, and pick up that stitch too. This prevents the small hole that would have otherwise formed at the corner of your heel flap.
Continue working the diamond pattern (round 11) across the instep sts on needle #2. With needle #3, pick up and knit 19 (21) sts along the other side of the heel flap (including the “extra” to prevent a hole) and then continue across half of the heel sts. Slip the remaining heel sts to the beginning of needle #1.
Decrease Gusset :
Next round, k across needle 1, continue in the diamond pattern across needle 2, k across needle 3.
Decrease round:
Needle 1: k to last 3 sts, k2 tog, k1
needle 2: continue in the diamond pattern
needle 3: k1, ssk, k to end.
Alternate between the plain round and the decrease round until you are back to 72 (80) sts total, working the bottom of the foot in plain stockinette and continuing the diamond pattern over the top of the foot.
When the foot is 2" shorter than the desired length begin the toe decreases. If you aren’t making these for yourself, or haven’t been able to measure the recipient’s foot, here’s a pretty good idea of men's foot lengths based on shoe size:
Toe decrease:
Reset stitch counter, or brain, to round 1.
R 1: Needle 1: k to last 3 sts, k2 tog, k1.
Needle 2: k1, ssk, k to last 3 sts, k2 tog, k1.
Needle 3: k1, ssk, k to end of needle.
R 2: k (Yes, you’re done with the diamonds now.)
Repeat rounds 1 and 2 until there are 36 (40) sts total.
Repeat round 1 until there are 16 sts total.
Knit across needle 1 and break yarn, leaving a 12" tail.
Use kitchener stitch to graft the remaining sts together.
Work in ends, and block.


Monday, March 24, 2008
Craaaaaaazy Yarn
Back on Chinese New Year, I was involved in some nutty spinning at Linda's shop. Please do check out the full description, complete with pictures, here at Mary Ellen's blog.
Basically, we all brought 3 oz of ready to spin fiber with us, not knowing what exactly would happen to it, only knowing Linda would provide another 3 for each of us so that we went home with 6. I had some idea that I would blend what I brought together with something of Linda's and bring the results home. boy are my ideas simple!
Instead, we combined all of it. Yes, ALL. We started layering our fiber (mostly dyed wool) across a big table.
Once that was spread around, out came the surprise, a bag of the craziest items you ever did or didn't think to include in yarn. Stuff like silk waste, dyed cotton balls, angelina fiber, very fine wire, feathers, strips of fabric, bits of yarn--craziness. After that was spread around, we would add another layer of the more conventional wool and dyed locks, then another layer of "spinny bits" as Donna called the crazy stuff, then more wool, etc, until it looked more or less like this:
At which point we had to get it off the table.
We rolled it up like a jelly roll, and then sliced the jelly roll into rounds, one for each spinner. The rounds didn't particularly hold together, not like a roving or anything so mundane, so I carried home a big paper bag of assorted fluff and nonsense, ready to figure out how to spin it. I spun by pulling handfuls out of the bag. I found it best to alternate between drafting what was between my hands and then letting go with my forward hand, so that the twist would travel back into the fiber supply, then draft again from there. Yes, I let the twist into the fiber supply. You've been told not to do that, haven't you? So have I. I usually don't. But I found it much more helpful to let the twist select the next combination of fibers to pull into the yarn. When I tried to draft more consistently (and conventionally) I was constantly pulling apart the unrelated bits of fluff in my hands and then having to join them back on to the yarn. It's not easy to join a piece of fabric, a bit of yarn, some wool, and a feather onto the already formed yarn while treadling and trying not to drop the rest of what's in your fiber supply hand. Since the actual roving was the easiest thing to join on, I kept grabbing more of it and not getting much of the other stuff in. That's when I realized that letting the twist travel up to grab it's own next batch of stuff, similar to a long draw, would best keep my yarn together and evenly select a bit of everything from the fiber in my hand. Spinning this stuff was not about making thin yarn, or making even yarn, it was back to that first day I learned to spin, it was just about making yarn: fiber that held together with twist. Holding together, that first and foremost goal, was my only goal. I ended up with this:
I had 6-8 oz. Too much for a hat, not nearly enough for a sweater, and frankly, I wasn't sure if I would ever wear it. I mean, I like color, and am not afraid to combine colors, but I do still like it if the finished piece has a describe-able palette. And I count "rainbow" as a palette.
I'm pleased just knowing that the yarn held up to being knitted. The finished project is a mobius scarf--the kind you knit on a circular needle starting in the middle and working toward the edge.* (Yes, not only does a mobius have only one side, it also has only one edge.) Mind boggling, but after making one like this, watching it form, I have an even deeper understanding of how the things work. (For those of you who didn't grow up with a science teacher father who encouraged you to play with mobius strips instead of toys there is a good explanation here and a video including some of the things Dad showed my brother and I that one could do with mobius strips here. Yes, we were raised to be dorks. I only wish I had thought to make the video. Dork!)
If I were to make this kind of yarn again (and it's intriguing enough and surprising enough that I probably will) there are a few thing I would do differently.
#1 I would start with some sort of a color pallet, however broad.
#2 I would ply it. I spun this one as a singles because it would have looked terrible plied, but it would have been much stronger if I had plied it against something else. Next time I'll try to ply against a sewing thread, so that the thread acts as a binder to stabilize the whole thing without losing the look of the singles.
#3 I felt that some of the "spinny bits" didn't add anything to the finished yarn, and/or were too difficult to work with to be worth using again. I loved the way the silk waste looked, and the angelina, and the wool locks, along with all the spinnable fibers we blended with, but I felt like the fabric and yarn bits didn't add anything and actually weakened the yarn in places. The cotton balls were just a pain without adding anything discernible to the texture. The feathers and metal are uncomfortable in the scarf and sometimes poke me.
I hear a rumor of an upcoming workshop to do the same thing, but only in natural fiber colors. I hope I'm in town for that workshop, it could make for some really beautiful yarn!
* The procedure was printed in a magazine a few years ago. I don't remember which one, and am away from my back issues at the moment, but I'm pretty sure it was either Spin Off or Interweave Knits.
**The cardigan I am wearing in Mary Ellen's process pictures is the one that had tea spilled on it during my flight and was then shat on by a bird during my first walk in DC. It came clean, no problem, and has been safe from calamity since then. Too bad I appear (at least from those pictures) to be outgrowing it.
Basically, we all brought 3 oz of ready to spin fiber with us, not knowing what exactly would happen to it, only knowing Linda would provide another 3 for each of us so that we went home with 6. I had some idea that I would blend what I brought together with something of Linda's and bring the results home. boy are my ideas simple!
Instead, we combined all of it. Yes, ALL. We started layering our fiber (mostly dyed wool) across a big table.
We rolled it up like a jelly roll, and then sliced the jelly roll into rounds, one for each spinner. The rounds didn't particularly hold together, not like a roving or anything so mundane, so I carried home a big paper bag of assorted fluff and nonsense, ready to figure out how to spin it. I spun by pulling handfuls out of the bag. I found it best to alternate between drafting what was between my hands and then letting go with my forward hand, so that the twist would travel back into the fiber supply, then draft again from there. Yes, I let the twist into the fiber supply. You've been told not to do that, haven't you? So have I. I usually don't. But I found it much more helpful to let the twist select the next combination of fibers to pull into the yarn. When I tried to draft more consistently (and conventionally) I was constantly pulling apart the unrelated bits of fluff in my hands and then having to join them back on to the yarn. It's not easy to join a piece of fabric, a bit of yarn, some wool, and a feather onto the already formed yarn while treadling and trying not to drop the rest of what's in your fiber supply hand. Since the actual roving was the easiest thing to join on, I kept grabbing more of it and not getting much of the other stuff in. That's when I realized that letting the twist travel up to grab it's own next batch of stuff, similar to a long draw, would best keep my yarn together and evenly select a bit of everything from the fiber in my hand. Spinning this stuff was not about making thin yarn, or making even yarn, it was back to that first day I learned to spin, it was just about making yarn: fiber that held together with twist. Holding together, that first and foremost goal, was my only goal. I ended up with this:
#1 I would start with some sort of a color pallet, however broad.
#2 I would ply it. I spun this one as a singles because it would have looked terrible plied, but it would have been much stronger if I had plied it against something else. Next time I'll try to ply against a sewing thread, so that the thread acts as a binder to stabilize the whole thing without losing the look of the singles.
#3 I felt that some of the "spinny bits" didn't add anything to the finished yarn, and/or were too difficult to work with to be worth using again. I loved the way the silk waste looked, and the angelina, and the wool locks, along with all the spinnable fibers we blended with, but I felt like the fabric and yarn bits didn't add anything and actually weakened the yarn in places. The cotton balls were just a pain without adding anything discernible to the texture. The feathers and metal are uncomfortable in the scarf and sometimes poke me.
I hear a rumor of an upcoming workshop to do the same thing, but only in natural fiber colors. I hope I'm in town for that workshop, it could make for some really beautiful yarn!
* The procedure was printed in a magazine a few years ago. I don't remember which one, and am away from my back issues at the moment, but I'm pretty sure it was either Spin Off or Interweave Knits.
**The cardigan I am wearing in Mary Ellen's process pictures is the one that had tea spilled on it during my flight and was then shat on by a bird during my first walk in DC. It came clean, no problem, and has been safe from calamity since then. Too bad I appear (at least from those pictures) to be outgrowing it.
Sunday, March 23, 2008
Tuesday, March 11, 2008
Drink Thief
This is what happens to unattended drinks at our house.
The little thief just had 3 more teeth pulled today. All he has left now is 4 incisors, 2 peg teeth, and one molar. The molar will be the last to go. Good thing Rusty's so tough--he recovers well.
Monday, March 03, 2008
Ups and Downs
Here is one more article about the situation at Studio Arena. I am not holding my breath.
In more pleasant news, I am enjoying my time at the Shakespeare here in DC. It's interesting whenever I get to a new place, to think through the pros and cons of life there. Of course, no city or situation is perfect, or perfectly horrible, so it's interesting to figure out which aspects of it's particular life are pluses, and which are minuses, especially compared to my home, or where I last came from.
I came here without my truck, having been told that there is no parking. So far, I don't miss the truck at all (and Rusty can really use all the bunny litter in the back that I've been using for extra weight in the snow). I'm in temporary housing until Wednesday, so right now, I have a 15-20 minute metro ride to work. The metro ride has afforded me almost an extra hour of knitting time every day. I am about to start the toe of the sock I cast on a week ago on the plane! I may not have packed enough knitting--only 3 more projects after this one. So metro knitting, definitely a plus. Not having a digital camera here (I've been using Chris's or my scanner) is a downer. How will I post pictures of the finished socks?!?!
Also on the plus side, there is a knitting store down the street from my costume shop. Minus--after a week of unemployment, I still have 2 weeks before getting my first paycheck, so I have not even touched the door of said yarn shop and only slightly fogged up their window.
The down side of using the metro is that fare cards are not perfect. My fare card, still with $10 credit, decided to crap out, which meant mailing it away for an alleged replacement and buying yet another one with dwindling unemployment money.
Also on the negative side, on the flight out here, after getting through security with a ticket bearing the wrong name (there's a reason they give you that marriage certificate!) I managed to dump a hot cup of tea all down the left side of myself, and the right side of the guy next to me. He looked displeased. Luckily, his smaller tea spots were on sort of tea colored pants, and had dried invisibly by the time we landed. After being driven to my current housing, I walked to the metro and rode it to the shop (to be sure I could find my way) and while walking a bird shat all down the right side of my poor, tea covered cardigan.*
Finally, the item that is both positive and negative--I am currently in temporary housing. I will have to move on Wednesday. Bad--living out of suitcases and trying not to buy too much food. There will probably be no Internet where I am moving too, which makes communication and audio book downloading difficult. Good--the new place is reputed to have a washer and dryer and the new place is 3 blocks from work, so no more paying for the metro on weekdays. Of course, that could also be bad, as I'll lose the metro knitting time.
So let's review:
Good
extra knitting time on the metro
knitting store down the street
washer and dryer in apartment
moving closer to work
free museums
gainfully employed
Bad
paying extra for busted metro card
no camera to photograph knitting
spilled tea
bird shit
soon no internet
And really, in another month to month and a half, I'll have to add cherry blossoms to the good side. Too bad I don't have a camera so I can post the pictures. Maybe after that first paycheck...
*Did I mention it was a hand washed, hand dyed, hand combed, hand spun, hand knit cardigan? Thank goodness my little travel bottle of shampoo washed out all of it's Monday adventures.
In more pleasant news, I am enjoying my time at the Shakespeare here in DC. It's interesting whenever I get to a new place, to think through the pros and cons of life there. Of course, no city or situation is perfect, or perfectly horrible, so it's interesting to figure out which aspects of it's particular life are pluses, and which are minuses, especially compared to my home, or where I last came from.
I came here without my truck, having been told that there is no parking. So far, I don't miss the truck at all (and Rusty can really use all the bunny litter in the back that I've been using for extra weight in the snow). I'm in temporary housing until Wednesday, so right now, I have a 15-20 minute metro ride to work. The metro ride has afforded me almost an extra hour of knitting time every day. I am about to start the toe of the sock I cast on a week ago on the plane! I may not have packed enough knitting--only 3 more projects after this one. So metro knitting, definitely a plus. Not having a digital camera here (I've been using Chris's or my scanner) is a downer. How will I post pictures of the finished socks?!?!
Also on the plus side, there is a knitting store down the street from my costume shop. Minus--after a week of unemployment, I still have 2 weeks before getting my first paycheck, so I have not even touched the door of said yarn shop and only slightly fogged up their window.
The down side of using the metro is that fare cards are not perfect. My fare card, still with $10 credit, decided to crap out, which meant mailing it away for an alleged replacement and buying yet another one with dwindling unemployment money.
Also on the negative side, on the flight out here, after getting through security with a ticket bearing the wrong name (there's a reason they give you that marriage certificate!) I managed to dump a hot cup of tea all down the left side of myself, and the right side of the guy next to me. He looked displeased. Luckily, his smaller tea spots were on sort of tea colored pants, and had dried invisibly by the time we landed. After being driven to my current housing, I walked to the metro and rode it to the shop (to be sure I could find my way) and while walking a bird shat all down the right side of my poor, tea covered cardigan.*
Finally, the item that is both positive and negative--I am currently in temporary housing. I will have to move on Wednesday. Bad--living out of suitcases and trying not to buy too much food. There will probably be no Internet where I am moving too, which makes communication and audio book downloading difficult. Good--the new place is reputed to have a washer and dryer and the new place is 3 blocks from work, so no more paying for the metro on weekdays. Of course, that could also be bad, as I'll lose the metro knitting time.
So let's review:
Good
extra knitting time on the metro
knitting store down the street
washer and dryer in apartment
moving closer to work
free museums
gainfully employed
Bad
paying extra for busted metro card
no camera to photograph knitting
spilled tea
bird shit
soon no internet
And really, in another month to month and a half, I'll have to add cherry blossoms to the good side. Too bad I don't have a camera so I can post the pictures. Maybe after that first paycheck...
*Did I mention it was a hand washed, hand dyed, hand combed, hand spun, hand knit cardigan? Thank goodness my little travel bottle of shampoo washed out all of it's Monday adventures.
Friday, February 29, 2008
In Our Nation's Capitol
I've tried to contact friends and family, but for anyone who does not yet know, I have shuffled off from Buffalo and am spending the next two months in Washington DC.
I'm here because I'm out of work. How did this happen? There have been lots of rumors flying, but the straight story is this, on Tuesday February 12, the board of directors of Studio Arena Theatre voted to cancel the remainder of the season. After their meeting, the entire staff were informed and given letters stating that we had been "indefinitely terminated."* My last day was that Friday, February 15th. Others were terminated on the 18th, so that they could finish running the current show and strike it. Shamefully, the board of directors did not announce the cancellation to the ticket holders or the general public until February 25th, 13 days (nearly 2 weeks) later. The poor box office staff were told that if anyone asked for tickets to one of the last 2 shows, they should make an excuse, like a computer error, for why they couldn't sell those tickets at the moment. The articles that the Buffalo News have printed about all of this have been spotty at best. The News staff does not include anyone with a theatre education or a clear knowledge of professional theatre, and of course the Board has kept them in the dark as much as possible. There is a very good article in playbill that I would encourage you to read. It gives the current situation and a fairly accurate description of any future possibilities.
I am, of course, incredibly upset, not just at losing my job, but also because my home town has lost its only professional theatre. Most of Buffalo didn't know that was a possibility until it was too late. No one even had a chance to help. Most of Buffalo also has not idea what a regional theatre is, or why the other semi-professional, non-LORT theatres in town are, in fact, not professional theatres, no matter how good their shows are.
With no other professional theatre in town, there is no other draping job in Buffalo, so after a week of unemployment I started a temporary job at The Shakespeare Theatre Company in Washington DC. Boy is it nice to be at a theatre that hasn't been failing for the past decade! I work in a spacious, well supplied shop with about 30 other people. We are building costumes for Julius Caesar and Antony and Cleopatra, which will be performed in rep on one of their two stages. Both productions will use the same stage, and any characters that occur in both plays will be played by the same actor. There area also a number of minor characters, like senators and soldiers, who will be seen in both, so that the two plays almost function as act I and II of the same play.
Also here at the Shakespeare Theatre (which does more than just Shakespeare) is Mary Zimmerman's Argonautica, which I saw last night. I feel incredibly lucky to have the chance to see this production in one of the few theatres in the country at which it's playing. This is the benefit of being at a healthy theatre in a healthy city. Not only was it a great play, but my friend Lisa was the scenic charge artist who painted this set when the show began it's run at Berkley Rep where she works. She has some great pictures in this blog post. And some more about making the set here.
Please do click on the links and look at the really cool pictures of this version of the famous Argonaut story. Here's a quick photo to pique your interest.

I miss Chris, Christopher, and Rusty terribly, but I am having a good time here, and trying to really appreciate everything this theatre has to offer. I plan to get out and do some letterboxing tomorrow, and on Sunday attend my first Reconciling in Christ* Lutheran Church and accompany a couple of coworkers to some of the many museums this town has to offer. Oh, and did I mention that not only do I already have 2 good friends in the costume shop but have worked with 2 others at other theatres, and my friend Tessa will also be coming up from Buffalo to join us!
*I find nothing "indefinite" about termination.
**an affiliation among Lutheran churches designating full welcome to gay members, guests and clergy
I'm here because I'm out of work. How did this happen? There have been lots of rumors flying, but the straight story is this, on Tuesday February 12, the board of directors of Studio Arena Theatre voted to cancel the remainder of the season. After their meeting, the entire staff were informed and given letters stating that we had been "indefinitely terminated."* My last day was that Friday, February 15th. Others were terminated on the 18th, so that they could finish running the current show and strike it. Shamefully, the board of directors did not announce the cancellation to the ticket holders or the general public until February 25th, 13 days (nearly 2 weeks) later. The poor box office staff were told that if anyone asked for tickets to one of the last 2 shows, they should make an excuse, like a computer error, for why they couldn't sell those tickets at the moment. The articles that the Buffalo News have printed about all of this have been spotty at best. The News staff does not include anyone with a theatre education or a clear knowledge of professional theatre, and of course the Board has kept them in the dark as much as possible. There is a very good article in playbill that I would encourage you to read. It gives the current situation and a fairly accurate description of any future possibilities.
I am, of course, incredibly upset, not just at losing my job, but also because my home town has lost its only professional theatre. Most of Buffalo didn't know that was a possibility until it was too late. No one even had a chance to help. Most of Buffalo also has not idea what a regional theatre is, or why the other semi-professional, non-LORT theatres in town are, in fact, not professional theatres, no matter how good their shows are.
With no other professional theatre in town, there is no other draping job in Buffalo, so after a week of unemployment I started a temporary job at The Shakespeare Theatre Company in Washington DC. Boy is it nice to be at a theatre that hasn't been failing for the past decade! I work in a spacious, well supplied shop with about 30 other people. We are building costumes for Julius Caesar and Antony and Cleopatra, which will be performed in rep on one of their two stages. Both productions will use the same stage, and any characters that occur in both plays will be played by the same actor. There area also a number of minor characters, like senators and soldiers, who will be seen in both, so that the two plays almost function as act I and II of the same play.
Also here at the Shakespeare Theatre (which does more than just Shakespeare) is Mary Zimmerman's Argonautica, which I saw last night. I feel incredibly lucky to have the chance to see this production in one of the few theatres in the country at which it's playing. This is the benefit of being at a healthy theatre in a healthy city. Not only was it a great play, but my friend Lisa was the scenic charge artist who painted this set when the show began it's run at Berkley Rep where she works. She has some great pictures in this blog post. And some more about making the set here.
Please do click on the links and look at the really cool pictures of this version of the famous Argonaut story. Here's a quick photo to pique your interest.

I miss Chris, Christopher, and Rusty terribly, but I am having a good time here, and trying to really appreciate everything this theatre has to offer. I plan to get out and do some letterboxing tomorrow, and on Sunday attend my first Reconciling in Christ* Lutheran Church and accompany a couple of coworkers to some of the many museums this town has to offer. Oh, and did I mention that not only do I already have 2 good friends in the costume shop but have worked with 2 others at other theatres, and my friend Tessa will also be coming up from Buffalo to join us!
*I find nothing "indefinite" about termination.
**an affiliation among Lutheran churches designating full welcome to gay members, guests and clergy
Monday, January 28, 2008
Bunny Yawn!
Rabbit yawns are cute and highly difficult to capture on film. This is the only recording we have of one of Rusty's huge tiny yawns.
(Click on the arrow in the middle of the image to play this short video)
Monday, January 21, 2008
I Made Pasties
...both kinds. The edible one is a cheese pasty, a very tasty English pastry filled with cheese and very English sorts of veggies like turnips.
The wearable ones were made under the tutelage of a friend who has worn them professionally.
There's more to making them than one would have guessed. They're quite structural. I hand tatted the lace you see around the circumference of each.
The wearable ones were made under the tutelage of a friend who has worn them professionally.
There's more to making them than one would have guessed. They're quite structural. I hand tatted the lace you see around the circumference of each.
Sunday, December 16, 2007
Nostepinne: Fiber and Woodworking
I've done a little woodworking here and there, but none in a long while. I learned in my stagecraft class in college, as well as from my Dad, and do actually own a few pieced of furniture I've made none of which have fallen apart, even after more than ten years for some. My favorite tool from college is the lathe. My friend Matt makes lovely bowls and other objects with his, and my friend and co-worker Scott makes pretty much everything possible with the one in the scene shop at work. Scott gave me a much needed refresher course (much better than what I had learned in college, in fact) and helped me with my first bit of woodworking in a long time--a nostepinne.
When Scott asked what I wanted to make, the first explanation I gave him was "a fancy stick." An apt description, yes? This is an ingenious and very old Scandinavian tool for winding a perfect center pull ball of yarn. Mine is made out of tulip wood and includes my addition of a yarn gauge at the end of the handle.
It's hard to tell from the photo I snapped quickly at work, but that is a perfect little ball of yarn that looks like it came off a ball winder. and look at the beautiful grain on that wood! I have enough wood for a second nostepinne, so I am refining my design and will start another, maybe in January.
When Scott asked what I wanted to make, the first explanation I gave him was "a fancy stick." An apt description, yes? This is an ingenious and very old Scandinavian tool for winding a perfect center pull ball of yarn. Mine is made out of tulip wood and includes my addition of a yarn gauge at the end of the handle.
It's hard to tell from the photo I snapped quickly at work, but that is a perfect little ball of yarn that looks like it came off a ball winder. and look at the beautiful grain on that wood! I have enough wood for a second nostepinne, so I am refining my design and will start another, maybe in January.
Does This Make My Ass Look Big?
Now and then, I get paid to make someone look fat. Contrary to what a few actresses may claim, that is not normally my goal, but about once a year I make some sort of padding for a show. Earlier this year I built a Pan costume with padded out haunches, and last year I got to pad men to look like corseted Victorian women for The Mystery of Irma Vep. This time around we're doing a Christmas show by A. R. Gurny called Indian Blood. One actress plays 3 of the minor characters, one of whom is described as "a Polish woman of ample proportion." The play is set in the 1940's, so I set out with the intention of creating a different and larger body for her that would give the impression of a large woman wearing a fairly firm foundation garment.
The right side of the photo will give you some sense of the size and shape of the actress before padding.
I started with a muslin base fitted to the actress, and then built onto it with filter foam (used in AC, air purification systems, etc). Because the filter foam is very open, it will dry quickly after washing.
I try to form padding in sections, partially to best mimic how flesh sits on the body, and partially to allow the padding to move with the wearer's body--so that they don't just look like they've stuffed pillows down their shirt!
I covered the padding with another layer of muslin, so it's a simple unit, easy to clean and wear, with a zipper up the back. In most cases I would make this cover in spandex to be smooth and skin-like, but in this case I wanted a firm woven cover to mimic a hearty undergarment. We did add spandex sleeves with a little padding to add just a little waddle to her otherwise too thin arm.

Finally I draped the actually costume over the padding. They are two pieces for the sake of laundry, but go on as one for the sake of the dresser. The actress, by the way, was thrilled to wear it! So gratifying for us, as some actresses have been made so insecure by years of auditions and agents that they might refuse to go on stage in a fat pad, or insist that the program note that they are padded and not actually fat. Hooray for the secure actresses!
The right side of the photo will give you some sense of the size and shape of the actress before padding.
I started with a muslin base fitted to the actress, and then built onto it with filter foam (used in AC, air purification systems, etc). Because the filter foam is very open, it will dry quickly after washing.
I try to form padding in sections, partially to best mimic how flesh sits on the body, and partially to allow the padding to move with the wearer's body--so that they don't just look like they've stuffed pillows down their shirt!
I covered the padding with another layer of muslin, so it's a simple unit, easy to clean and wear, with a zipper up the back. In most cases I would make this cover in spandex to be smooth and skin-like, but in this case I wanted a firm woven cover to mimic a hearty undergarment. We did add spandex sleeves with a little padding to add just a little waddle to her otherwise too thin arm.
Finally I draped the actually costume over the padding. They are two pieces for the sake of laundry, but go on as one for the sake of the dresser. The actress, by the way, was thrilled to wear it! So gratifying for us, as some actresses have been made so insecure by years of auditions and agents that they might refuse to go on stage in a fat pad, or insist that the program note that they are padded and not actually fat. Hooray for the secure actresses!
Thursday, November 22, 2007
Wedding Photos
The long awaited wedding photos are finally on Flickr. Six months after the wedding, we have picked out the photos of which we'd like prints, and have ordered them from the photographer. It was a big job to pick out just a few from so many. Maybe in a few more years we'll actually get a wedding album put together. Maybe I should go buy a wedding album as some sort of start towards that.
Anyway, here they are! These are a few of our favorites, but to see the whole batch, click here. I suggest using the "view slide show" option in the upper right if you want to view all of them.
This seems to be the best view of the infamous bunny stole.
Thank you to everyone who was able to come share our wedding day with us, especially folks who had to travel or rearrange their schedules to be there. We both really appreciated it.
Anyway, here they are! These are a few of our favorites, but to see the whole batch, click here. I suggest using the "view slide show" option in the upper right if you want to view all of them.
Sunday, November 18, 2007
Free Watch Cap Hat Pattern
I'm also posting this on Ravelry, but since not everyone is on it yet, here's a free hat pattern for the whole internet to enjoy. I try to do some charity knitting every year. From what I observed in my old guild and elsewhere, most charity knitting tends to be colorful and sized for small children. Some of the organizations that the knitting was donated to actually requested plain black hats for their male clients. So since nothing is worse than looking like you're wearing a charity hat, I present a pattern for a good warm charity hat that doesn't look like a charity hat, and can be worn by an adult man without embarrassment.
Charity Watch Cap by Erica Fire
*note As you get the hang of knitting brioche stitch you'll find that you can make the yarn over and the slip one immediately after it in one movement. You'll also find that knitting or purling these two together can be done in basically one movement. After a few rows, brioche becomes a fairly fast and easy stitch to knit.
Pattern: For s (m, l)
Cast on 52 (54, 56) sts. Join, being careful not to twist. Knit in pattern until hat measures 9-9 1/2 inches long. End after completing a round 4. Remember that you only knit rounds 1 and 2 after the cast on, and knit the rest of the piece alternating rounds 3 and 4.
Once hat is 9 -9 1/2" long (depending on how deep you'd like the turn up) begin decrease rounds after completing round 4.
Dec Round 1: *p2tog, k1, rep from * around.
round 2: *p1, k1 rep from * around
Knit in the round in brioche stitch with 2 strands of superwash yarn held together. Having walked to work in Buffalo the past 3 winters, I can attest to wool being way warmer than acrylic, and given the circumstances many charity knitting recipients are in, machine washable is much more practical than expecting a single mom to hand wash all her kids' hats and mittens, or a man in a boarding house to find a sink to handwash in.
Yarn: knit holding 2 strands together of a good superwash wool. I've used lambspride super wash, Cleckheaton Country 8 ply, or Classic Elite's superwash. Use 3 balls.
Needles: size 8 16" circular needles and size 8 double point needles.
Gauge: 3 3/4 sts per inch in stockinette on size 8 needles, or size needed to obtain gauge. Be sure to check your gauge--I knit loose!
Sizing: small to fit head size 20 to 21 1/2. medium to fit head size 21 1/2 to 22 1/2. large to fit head size 22 1/2 to 24
Pattern Stitch:
Round 1: *p1, yo, sl 1 pwise wyib, rep from *.
Round 2: *yo, sl1 pwise wyib, k2 tog, rep from *
Round 3: *p2 tog, yo, sl1 pwise wyib, rep from *
Round 4: * yo, sl 1 pwise wyib, k2tog, rep from *
repeat rounds 3 & 4 for the rest of the piece.
Yarn: knit holding 2 strands together of a good superwash wool. I've used lambspride super wash, Cleckheaton Country 8 ply, or Classic Elite's superwash. Use 3 balls.
Needles: size 8 16" circular needles and size 8 double point needles.
Gauge: 3 3/4 sts per inch in stockinette on size 8 needles, or size needed to obtain gauge. Be sure to check your gauge--I knit loose!
Sizing: small to fit head size 20 to 21 1/2. medium to fit head size 21 1/2 to 22 1/2. large to fit head size 22 1/2 to 24
Pattern Stitch:
Round 1: *p1, yo, sl 1 pwise wyib, rep from *.
Round 2: *yo, sl1 pwise wyib, k2 tog, rep from *
Round 3: *p2 tog, yo, sl1 pwise wyib, rep from *
Round 4: * yo, sl 1 pwise wyib, k2tog, rep from *
repeat rounds 3 & 4 for the rest of the piece.
*note As you get the hang of knitting brioche stitch you'll find that you can make the yarn over and the slip one immediately after it in one movement. You'll also find that knitting or purling these two together can be done in basically one movement. After a few rows, brioche becomes a fairly fast and easy stitch to knit.
Pattern: For s (m, l)
Cast on 52 (54, 56) sts. Join, being careful not to twist. Knit in pattern until hat measures 9-9 1/2 inches long. End after completing a round 4. Remember that you only knit rounds 1 and 2 after the cast on, and knit the rest of the piece alternating rounds 3 and 4.
Once hat is 9 -9 1/2" long (depending on how deep you'd like the turn up) begin decrease rounds after completing round 4.
Dec Round 1: *p2tog, k1, rep from * around.
round 2: *p1, k1 rep from * around
rounds 3-5: continue in p1, k1 rib
round 6: *p3 tog, k1, rep from * End p3 tog, k1 ([p1, k1], [p3 tog, k1])
(switch to dpn's when there are too few stitches to comfortably fit around circular needle.)
rounds 7-8: continue in p1, k1 rib
round 9: *p3 tog, k1, rep from * End p1, k1 ([p3 tog, k1], [p3 tog, k1])
round 10: continue in p1, k1 rib
round 11: *p3 tog, k1, rep from * End p1, k1 (all sizes)
round 12: cut yarn to about 12" long, thread through yarn needle, run through remaining sts on needles twice, draw them together, run yarn to inside, knot off and weave in end. Weave in beginning end and any other ends in hat. Wash, block lightly without flattening stitches, and wear or donate.
round 6: *p3 tog, k1, rep from * End p3 tog, k1 ([p1, k1], [p3 tog, k1])
(switch to dpn's when there are too few stitches to comfortably fit around circular needle.)
rounds 7-8: continue in p1, k1 rib
round 9: *p3 tog, k1, rep from * End p1, k1 ([p3 tog, k1], [p3 tog, k1])
round 10: continue in p1, k1 rib
round 11: *p3 tog, k1, rep from * End p1, k1 (all sizes)
round 12: cut yarn to about 12" long, thread through yarn needle, run through remaining sts on needles twice, draw them together, run yarn to inside, knot off and weave in end. Weave in beginning end and any other ends in hat. Wash, block lightly without flattening stitches, and wear or donate.
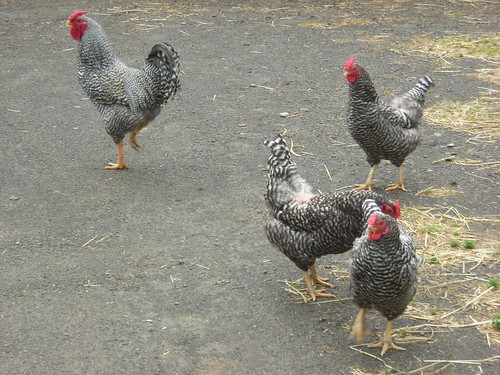
California Bird Rescue
My friend Lisa live is the San Francisco Bay area, and is a bird lover. She had volunteered at an area bird rescue organization a few years ago. She has been an amazing asset to them in the recent oil spill. She has been one of many volunteers making it possible to re-release cleaned and stabilized birds back into the wild. You can read about what she's been doing over the past week in her posts at her blog.
Sunday, November 11, 2007
Fleece Study: The Long Wools and Novelty Locks
Remembering way back...I've been working on a fleece study over the past year where we use samples of wool from different breeds of sheep to learn about how they differ and how best to use each. We did the fine wools first, and now I've just finished the long wools. I started out spinning them all "plain vanilla" like I did with the fines. This was a fine approach for fine wools, as that's how I'm most likely to use them, but I got bored of spinning evenly and consistently and Navajo plying each sample. Luckily I remembered that many long wools are uniquely suited to making boucle. Why not use a sample as a chance to also learn new spinning techniques?

I found conflicting information among my books (and one video) on how to make a boucle. I tried at least two before it worked. The sample on the left shows my first rather awkward efforts. On the right is a much more successful sample of boucle. I spun a few of the long wools as boucle, but couldn't take it any more. Man is boucle a pain to make! The first plying step, where you make the loops, is very time consuming as you carefully push up one ply to make all those little loops. Now I know I'll probably never spin enough boucle for a sweater, although it would be a nice accent, maybe as collar and cuff. After a few boucles I took a class at the finger lakes fiber festival. It was on spinning dyed locks, which are usually either long wools or mohair. Perfect! My favorite technique learned was to incorporate a lock at a time into a two ply yarn by placing it between the strands while plying and letting the twist lock it in. I love the look of this yarn. Here's what I did in class:
I'll be interested to see how something like this knits up, with a few thick fuzzy stitches every so often. I did a few study fleeces this way too, but they aren't as visually interesting because they're all one color. My favorite of the boucles, and possibly of all the long wools was the Wensleydale x Cotswold.
It's long and shiny and soft, but still has the right texture to curl into boucle. This I might make enough of for a little something, maybe a scarf. Also, I've been meaning to show my exciting new tool. I found this in Delhi, south of Cooperstown, when I was out there this summer.
Subscribe to:
Posts (Atom)